Seasoned system administrators know that routinely reading system logs is an important task, but reading endless lines from logs is both time-consuming and boring, especially if you are responsible for a large number of busy servers. In this article I will show you how to set up a system that gathers and archives system logs from many network hosts and emails only important or irregular system events to administrators.
The majority of GNU/Linux distributions uses the good old syslogd system logger by default, which is based on the original 4.3BSD syslogd daemon. Syslogd is a fine system logger, but it lacks some advanced features modern alternatives offer. We will use syslog-ng instead, which provides all the functionality of the traditional syslogd along with some nice enhancements. Among others, it provides powerful filtering capabilities based on message content, and can also be used in a firewalled environment without problems.
Installation is a breeze since most distributions provide binary packages. If you prefer to manually build the program, check the INSTALL file included in the source tarball, which outlines all the necessary steps. Make sure to uninstall syslogd before installing syslog-ng.
The syntax of the configuration file might seem peculiar and complex compared to the traditional syslog.conf syntax, but it offers almost limitless customization options. Make sure to read the syslog-ng.conf man page for information on how to use it.
Since our logging system will gather logs from other hosts, we need to instruct it to listen for network connections. Syslog-ng supports both the TCP and UDP protocols. IANA has assigned the 514/udp port to the syslog service, so we will use that port for maximum compatibility with syslogd and network devices such as routers. If you use syslog-ng on all your hosts, it's better to use the TCP protocol, which is more reliable and firewall-friendly.
Add the following lines to your /etc/syslog-ng/syslog-ng.conf to the appropriate sections indicated by comments (lines starting with #) to enable listening for network connections on a specific IP address, and to archive logs from remote hosts as /var/log/$HOST/$FACILITY (e.g. /var/log/mailserver/mail):
## add this to the options section
create_dirs(yes);
long_hostnames(off);
keep_hostname(yes);
# uncomment the following line only on a LAN with working DNS
#use_dns(yes);
## add this to the source section
source s_udp {
udp ( ip(192.168.1.2) ); # replace with your system's IP address
};
## add this to the destination section
destination df_udp {
file ("/var/log/$HOST/$FACILITY");
};
## add this to the log section
log {
source(s_udp);
destination (df_udp);
};
On the remote hosts add the following lines in /etc/syslog-ng/syslog-ng.conf or /etc/syslog.conf, depending on whether they run syslog-ng or syslogd respectively:
## /etc/syslog-ng/syslog-ng.conf
## add this to the destination section
destination remote_udp { udp("192.168.1.2"); }; # replace with your log server's IP address
## add this to the log section
log { source(src); destination(remote_udp); };
## /etc/syslog.conf
# use tabs instead of space
*.* @192.168.1.2 # replace with your log server's IP address
You can add additional filters to better suit your needs or even log to a database like PostgreSQL. Note that syslog traffic between hosts is unencrypted; if you want to gather logs from remote hosts over the Internet, create SSH tunnels first, for security.
Logcheck
At this point you have configured a full-featured syslog server that gathers and archives logs from multiple servers, but so far you still have to read those logs manually. Now we'll add logcheck to the equation.
Logcheck is an excellent program that parses log files, filters out expected, normal events based on pre-defined regular expressions, then summarizes the remaining entries and emails them to the system administrator's account. Logcheck was previously part of the Sentry tools suite, but since it had been unmaintained for a long time, it was forked by Debian developers, who have done a wonderful job integrating logcheck into the system. Most network daemon packages include logcheck rules out of the box.
To install logcheck on a Debian-based system simply apt-get install the logcheck, logtail, and logcheck-database packages; the last of the three provides lots of ready-made rules for various system events. To install it on other distributions, download the source tarball and read the INSTALL file. Since it is just a shell script it does not need any compilation.
Configuration is simple. First enter which log files you want to be checked by logcheck in /etc/logcheck/logcheck.logfiles. Logcheck supports three levels of filtering: paranoid, server, and workstation. Each level uses a directory named /etc/logcheck/ignore.d.level_name that includes filtering rules files with different verbosity levels. Paranoid produces highly verbose output and should be used only on high-security systems running a minimum number of services. Server should be fine for most systems and is used by default. Workstation filters out most of the messages and thus produces the least verbose output of the three. You can define which filtering level should be used in /etc/logcheck/logcheck.conf, along with other parameters, such as the recipient email address and the subject of the emails.
Logcheck uses standard regular expressions to filter logs. It's not difficult to write custom rules; read the WRITING RULES paragraph of the docs/README.logcheck-database file in the source tarball (or /usr/share/doc/logcheck-database/README.logcheck-database.gz in Debian) for more information. If you're new to regular expressions, this guide might be useful. As an example, check this filter file for Dovecot:
^\w{3} [ :0-9]{11} [._[:alnum:]-]+ imap-login: Login: [.[:alnum:]-]+ \[[0-9.]+\]$
^\w{3} [ :0-9]{11} [._[:alnum:]-]+ imap-login: Disconnected \[[0-9.]+\]$
^\w{3} [ :0-9]{11} [._[:alnum:]-]+ imap\([^[:space:]]+\): File isn't in mbox format: [^[:space:]]+$
Logcheck runs periodically from cron. The default cron job installed by the Debian package (/etc/cron.d/logcheck) runs logcheck every hour or when the system reboots. Unless you want 24 logcheck email messages per day, you should adjust how often it should run by editing the file. I prefer to run it on a daily basis.
Wednesday, April 15, 2009


EC order gags media on poll eve coverage
THE Election Commission said on Tuesday that the electronic media cannot telecast anything related to elections which can influence voters in areas where polls are to take place, 48 hours preceding voting.
The Election Commissioner said, TV channels were barred from telecasting poll-related programmes like interviews, discussions and poll analyses and surveys that could influence voters 48-hour before polling day.
In a separate order issued under section 126 of the Representation of People's Act that prohibits displaying any election matter on television or any related medium 48 hours before poll, EC has also banned dissemination of results of opinion and exit polls by the media. The gag on electronic media is seen as unsuitable for multi-phase elections as well as innocent of the ways the media functions.
The official said, "the rule applies even to national channels. During this period, national channels are not allowed to telecast such programmes about Andhra Pradesh. Even animation programmes that could influence voters should not be screened."
Mr Rao explained that with the first phase polling scheduled for April 16, TV channels would not even be allowed to air poll-related analyses of seats going to the polls on April 23. Failure to comply would mean imprisonment up to two years or fine or both.
The Election Commissioner said, TV channels were barred from telecasting poll-related programmes like interviews, discussions and poll analyses and surveys that could influence voters 48-hour before polling day.
In a separate order issued under section 126 of the Representation of People's Act that prohibits displaying any election matter on television or any related medium 48 hours before poll, EC has also banned dissemination of results of opinion and exit polls by the media. The gag on electronic media is seen as unsuitable for multi-phase elections as well as innocent of the ways the media functions.
The official said, "the rule applies even to national channels. During this period, national channels are not allowed to telecast such programmes about Andhra Pradesh. Even animation programmes that could influence voters should not be screened."
Mr Rao explained that with the first phase polling scheduled for April 16, TV channels would not even be allowed to air poll-related analyses of seats going to the polls on April 23. Failure to comply would mean imprisonment up to two years or fine or both.
Tuesday, April 14, 2009
SC seeks undertaking from Varun, hearing put off
THE Supreme Court has adjourned the hearing on Varun Gandhi’s bail plea till Thursday, which means the BJP leader will have to spend a few more days in jail.
The apex court said that Varun can be free provided he gives in writing to the court that he will make no provocative speeches during his campaign. Varun's lawyer told the court that he would give the undertaking.
Now, the SC has asked the Uttar Pradesh government if Varun gives an undertaking, will it be acceptable to the UP government.
Varun Gandhi, who has been detained in the Etah jail, has challenged his detention under the National Security Act (NSA) by the Uttar Pradesh government.
The apex court bench headed by Chief Justice KG Balakrishnan will consider the plea for Varun's release to enable him to file his nomination papers as well as to contest elections from Pilibhit. The 29-year old was arrested under section 153 A of the Indian Penal Code for delivering a communal speech during an election rally in March The NSA was slapped on him following violence in Pilbhit during his surrender before the court.
While Varun's lawyers are likely to argue that the CD containing the hate speech is doctored, and therefore inadmissible as material evidence to book him under the NSA, the Uttar Pradesh government is expected to take a stand that Varun’s release would pose a threat to peace and could lead to a serious law and order problem in the state.
In its affidavit, the Mayawati government has described Varun as a "national threat to communal peace and harmony", thereby defending its action of invoking the NSA.
The apex court said that Varun can be free provided he gives in writing to the court that he will make no provocative speeches during his campaign. Varun's lawyer told the court that he would give the undertaking.
Now, the SC has asked the Uttar Pradesh government if Varun gives an undertaking, will it be acceptable to the UP government.
Varun Gandhi, who has been detained in the Etah jail, has challenged his detention under the National Security Act (NSA) by the Uttar Pradesh government.
The apex court bench headed by Chief Justice KG Balakrishnan will consider the plea for Varun's release to enable him to file his nomination papers as well as to contest elections from Pilibhit. The 29-year old was arrested under section 153 A of the Indian Penal Code for delivering a communal speech during an election rally in March The NSA was slapped on him following violence in Pilbhit during his surrender before the court.
While Varun's lawyers are likely to argue that the CD containing the hate speech is doctored, and therefore inadmissible as material evidence to book him under the NSA, the Uttar Pradesh government is expected to take a stand that Varun’s release would pose a threat to peace and could lead to a serious law and order problem in the state.
In its affidavit, the Mayawati government has described Varun as a "national threat to communal peace and harmony", thereby defending its action of invoking the NSA.
Laloo-Mulayam-Paswan claim to be kingmakers
THE strong political formation among foes-turned-friends, Laloo, Mulayam and Ram Vilas Paswan are almost confident that they would be able to have a significant say in the government formation process at the Centre after the elections.
Speaking at its first show as the 'Fourth Front' in Uttar Pradesh, the three leaders addressed a joint rally at Saifai in Etawah district of Uttar Pradesh on Thursday, claiming that the next government at the Centre cannot be formed without them.
The troika, comprising RJD, LJP and SP, was formed in March 2009, and will contest 120 seats in the three states. The leaders repeatedly said that the new coalition is part of the UPA, and will work together to stop communal forces from coming to power.
In the rally, Laloo Prasad Yadav said,"Three brothers have come together, not only to win Lok Sabha elections, but also to fight communalism. We will show our strength in the cow belt."
The three joined hands after the Congress said it would not have a nationwide alliance. After Saifai, they are planning to hold joint rallies in Varanasi, Lucknow and several places in Bihar.
Speaking at its first show as the 'Fourth Front' in Uttar Pradesh, the three leaders addressed a joint rally at Saifai in Etawah district of Uttar Pradesh on Thursday, claiming that the next government at the Centre cannot be formed without them.
The troika, comprising RJD, LJP and SP, was formed in March 2009, and will contest 120 seats in the three states. The leaders repeatedly said that the new coalition is part of the UPA, and will work together to stop communal forces from coming to power.
In the rally, Laloo Prasad Yadav said,"Three brothers have come together, not only to win Lok Sabha elections, but also to fight communalism. We will show our strength in the cow belt."
The three joined hands after the Congress said it would not have a nationwide alliance. After Saifai, they are planning to hold joint rallies in Varanasi, Lucknow and several places in Bihar.
Indian Elections - Varun Gandhi's Hate Speech
[Note to non-Indian visitors and unacquainted Indians: Varun Gandhi, 29, is the nephew of Sonia Gandhi and grandson of Indira Gandhi, former Indian Prime Minister. However, unlike Sonia and Indira who were in the Indian National Congress Party, Varun is in the Hindu nationalist Bharatiya Janta Party (translated into the Indian People’s Party). This is the first time he is running for office. BJP is not new to inciting religious violence against Muslims (to be fair, some Indian Muslim groups are often involved in acts that give the BJP ‘excuses’ to do what they do. However, the BJP and its sister and mother organizations, the Bajrang Dal, Vishva Hindu Parishad and the RSS, are no less and they are collectively ‘guilty’ at times). In India, Hindu and Muslim fundamentalism feed each other. A regressive Islamic philosophy has met a bigoted Hindu Nationalist one. The BJP derives its cadres from those who believe the Congress “appeases” the minorities (read, “Muslims”) at the expense of “Hindu interests”.]
Here are portions of the speech made by Varun Gandhi in Pilibhit amid a crowd that was reeling in anti-Muslim hatred due to certain incidents in recent local history, as appeared in the Indian Express, March 18 ’09:

I would add here that if the people of that region had really seen outrages by the Muslim community, the campaigning leaders should have spoken about bringing law-and-order and justice to the region. To call for the heads of Muslims is nothing short of barbaric.
After a CD was released of this speech by some private entities, presumably political rivals, Varun denied making any of those statements claiming that the speech was doctored and the voice isn’t his. On TV today, he gave an example of the doctoring. He said he never referred to Muslims as “Katuas” (derogatory term for a Muslim referring to their circumcision – equivalent to calling an African American as ‘nigger’) and instead was referring to “vote Katuas” which he claims means those non-serious political candidates who run in elections to “cut votes” of popular candidates. However yesterday, in the Indian Express, he claimed he was referring to “galat tatvas” roughly meaning “anti-social elements”, and not “Katuas”. He claimed that was added later. Two explanations in two days. And to top that, claims that he “never spoke those words”.
He seems guilty on the face of it. The video doesn’t seem doctored. However, I would be wrong to call him that until and unless he is proven guilty in a court of law. Innocent unless proven otherwise. But hunch is that he isn’t innocent.

Here are portions of the speech made by Varun Gandhi in Pilibhit amid a crowd that was reeling in anti-Muslim hatred due to certain incidents in recent local history, as appeared in the Indian Express, March 18 ’09:
I would add here that if the people of that region had really seen outrages by the Muslim community, the campaigning leaders should have spoken about bringing law-and-order and justice to the region. To call for the heads of Muslims is nothing short of barbaric.
After a CD was released of this speech by some private entities, presumably political rivals, Varun denied making any of those statements claiming that the speech was doctored and the voice isn’t his. On TV today, he gave an example of the doctoring. He said he never referred to Muslims as “Katuas” (derogatory term for a Muslim referring to their circumcision – equivalent to calling an African American as ‘nigger’) and instead was referring to “vote Katuas” which he claims means those non-serious political candidates who run in elections to “cut votes” of popular candidates. However yesterday, in the Indian Express, he claimed he was referring to “galat tatvas” roughly meaning “anti-social elements”, and not “Katuas”. He claimed that was added later. Two explanations in two days. And to top that, claims that he “never spoke those words”.
He seems guilty on the face of it. The video doesn’t seem doctored. However, I would be wrong to call him that until and unless he is proven guilty in a court of law. Innocent unless proven otherwise. But hunch is that he isn’t innocent.
India election 2009 : world's biggest democracy
The General elections in India are the elections by which the Indian electorate chooses the diverse members of the Lok Sabha in the Parliament for the subsequently term of five years. The voters also ultimately votes for the Prime Minister as the head chosen by the majority party or the majority alliance becomes the next Prime Minister.

The General elections is the prime election work out in the world. With the dawn of EVMs, the election process has become more protected and swift.
Indian general election, 2009
An election is a administrative process by which a inhabitants chooses an character to hold recognized office. This is the natural device by which present representative democracy fills offices in the legislature, sometimes in the executive and judiciary, and for regional and local government. This course of action is also used in many other privileged and business organizations, from clubs to voluntary associations and corporations.
The worldwide use of elections as a contrivance for selecting legislature in modern democracies is in contrast with the follow in the democratic archetype, ancient Athens. Elections were well thought-out an oligarchic institution and most political offices were onthe top using sortition, also known as allowance, by which officeholders were chosen by lot.
Electoral reform describes the process of introducing pale electoral systems where they are not in position, or humanizing the fairness or usefulness of existing systems. Psephology is the study of results and other statistics relating to elections.
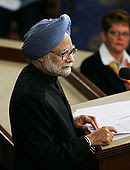
Leader:- Manmohan Singh
Last election:- 145 seats, 26.7%
Leader's seat:- Assam (Rajya Sabha)
Party:- Congress

Leader:- Lal Krishna Advani
Last election:- 138 seats, 22.2%
Leader's seat:- Gandhinagar
Party:- BJP
India will seize general elections to the 15th Lok Sabha in 5 phases on April 16, April 22, April 23, April 30, May 7 and May 13, 2009. The outcome of the election will be announced in single phase on May 16, 2009.
According to the Indian Constitution, elections in India for the Lok Sabha (the national parliament) must be seized at least every five years under conventional circumstances. With the last elections held in 2004, the term of the 14th Lok Sabha expires on June 1, 2009.
The election is conducted by the Election Commission of India, which estimates an electorate of 714 million voters, an increase of 43 million over the 2004 election. During the financial plan presented in February 2009, Rupees 1,120 Crores (Approx. EUR 180 M) was budgeted for election operating expense.
Think Twice before you choose.

The General elections is the prime election work out in the world. With the dawn of EVMs, the election process has become more protected and swift.
Indian general election, 2009
All 543 seats in the Lok Sabha
An election is a administrative process by which a inhabitants chooses an character to hold recognized office. This is the natural device by which present representative democracy fills offices in the legislature, sometimes in the executive and judiciary, and for regional and local government. This course of action is also used in many other privileged and business organizations, from clubs to voluntary associations and corporations.
The worldwide use of elections as a contrivance for selecting legislature in modern democracies is in contrast with the follow in the democratic archetype, ancient Athens. Elections were well thought-out an oligarchic institution and most political offices were onthe top using sortition, also known as allowance, by which officeholders were chosen by lot.
Electoral reform describes the process of introducing pale electoral systems where they are not in position, or humanizing the fairness or usefulness of existing systems. Psephology is the study of results and other statistics relating to elections.
Leader:- Manmohan Singh
Last election:- 145 seats, 26.7%
Leader's seat:- Assam (Rajya Sabha)
Party:- Congress
Leader:- Lal Krishna Advani
Last election:- 138 seats, 22.2%
Leader's seat:- Gandhinagar
Party:- BJP
India will seize general elections to the 15th Lok Sabha in 5 phases on April 16, April 22, April 23, April 30, May 7 and May 13, 2009. The outcome of the election will be announced in single phase on May 16, 2009.
According to the Indian Constitution, elections in India for the Lok Sabha (the national parliament) must be seized at least every five years under conventional circumstances. With the last elections held in 2004, the term of the 14th Lok Sabha expires on June 1, 2009.
The election is conducted by the Election Commission of India, which estimates an electorate of 714 million voters, an increase of 43 million over the 2004 election. During the financial plan presented in February 2009, Rupees 1,120 Crores (Approx. EUR 180 M) was budgeted for election operating expense.
Think Twice before you choose.
India Election '09
Election campaigning is in full swing in India and amidst all the frenzy, the Pilbhit constituency in Uttar Pradesh, has come under the scanner after one of its young BJP candidates, Varun Gandhi courted controversy over his allegedly communal and inflammatory campaign speeches during election rallies in his constituency on March 6th and 8th, 2009.
Over the next few weeks, video footage of Varun Gandhi's speeches were repeatedly splashed across TV channels. When questioned by the media and the Election Commission. Varun stated that the audio in the footage had been doctored and it was a ploy against him. Unmoved by his denial, the Election Commission sent him a show cause notice for violating the Model Code of Conduct, and later, on 22 March 2009, found him guilty of making ‘hate speeches'.
A spate of criminal cases lodged against him, on 29th March, Varun Gandhi surrendered before a local court in Pilbhit. He was arrested and jailed. The State Government has now booked him under the National Security Act (NSA) on “charges of inciting communal passion by making provocative and inflammatory speeches during [election campaign] meetings”.
As of today, Varun Gandhi continues to be in the eye of the storm as various political parties and their leaders try to gain maximum mileage out of the incident. The Rashtriya Janata Dal supremo Lalu Prasad Yadav has gone as far as to court controversy himself after making a speech berating Varun. The BJP on the other hand, has renewed it's stance of backing it's protege Varun Gandhi with both political and legal aid.
The blogosphere too has been abuzz with opinions on the Varun Gandhi controversy.
Youth ki Awaaz writes:
If young leaders like Varun give such defamatory remarks, what can we expect from the others? The fact that India is a country with communal diversity makes it mandatory for each and every citizen to have a feeling of brotherhood.
Blogger ak too is apprehensive about young candidates like Varun Gandhi, who could also be tomorrow's leaders spewing such rhetoric. He says:
To hear someone so young like Varun Gandhi give out that hate speech against the muslims in such mean tones was just shameful. Are these the young leaders that is going to takle(sic) India forward??
Another blogger Vijay Vikram discusses what he feels was the motivation behind Varun's rhetoric.
It is a sad fact of Indian - for that matter all democratic polity - that aspiring statesmen have to appeal to the lowest common denominator for electoral gains. That is precisely what Varun Gandhi was doing. Varun Gandhi's remarks were borne out of political necessity, nothing else.
On the other hand, some bloggers have come out in support of Varun Gandhi, seeing him as a scapegoat in the drama of India's minority-vote politics. Sreekrishnan Venkatesan writes:
i did not find anything wrong in Varun Gandhi's speech. He warned any other religious fanatics killing Hindus, which to me looked very much normal. In fact this isn't as bad like congress which goes all out to playing the communal card, with non hindu religions. Hypocrisy in all its strength. Supporting a minority religious community is “Secular” while supporting Hindus is “communal”.
In this entire controversy, the role of the MSM has also come under scrutiny. Shahid Siddiqui of Media-Mania wonders why the TV channels devoted as much as over 22.57 hrs of prime time playing back the video footage. He asks:
If the media really believed that Varun Gandhi’s speech would cause unrest among a section of the people, did the repeat telecasts of the speech make any sense?…All the TV channels have overplayed the issue. It was not even authenticated if the CD was original. As per the ethics of journalism, it should not have been played as it has been done, especially during the elections….The role of media is certainly open to question. While reporting that it was a “hate speech” “blatantly communal” etc, did the media behave responsibly by telecasting the tape umpteen times a day for the last few days?
Bloggers are also discussing whether Varun Gandhi should have been booked under the NSA. Many of them seem to echo the words of the Chief Minister of Jammu & Kashmir, Omar Abdullah, who stated that “The hate speech of BJP's Lok Sabha candidate Varun Gandhi did not threaten national security and a law other than the National Security Act could have been invoked to deal with it”. In this context,Vinay writes:
… punishing him under NSA is unwarranted. Even though his speech had the potential to disturb public order, the warning by election Commission and subsequent FIRs under Representation of People Act were sufficient.
The CD containing his speech came into light some 15 days later after he gave it. It means his speech did not lead to any violence immediately, which is actually case in most of the instances.
Listening to his speech one can say that it was more of rhetoric in spite of being venomous.
Nonetheless he deserves punishment, but not under NSA.
He has been arrested under the preventive detention clause of NSA, which is clearly doctored to prevent him from contesting elections.
Varun's lawyers have challenged his detention in the Supreme Court. The case will come up for hearing on April 13th.
Script to Install CentOS 5 on Amazon
#!/bin/bash -e
# Copyright (c) 2007 RightScale Inc.
#
# Permission is hereby granted, free of charge, to any person obtaining
# a copy of this software and associated documentation files (the
# "Software"), to deal in the Software without restriction, including
# without limitation the rights to use, copy, modify, merge, publish,
# distribute, sublicense, and/or sell copies of the Software, and to
# permit persons to whom the Software is furnished to do so, subject to
# the following conditions:
#
# The above copyright notice and this permission notice shall be
# included in all copies or substantial portions of the Software.
#
# THE SOFTWARE IS PROVIDED "AS IS", WITHOUT WARRANTY OF ANY KIND,
# EXPRESS OR IMPLIED, INCLUDING BUT NOT LIMITED TO THE WARRANTIES OF
# MERCHANTABILITY, FITNESS FOR A PARTICULAR PURPOSE AND
# NONINFRINGEMENT. IN NO EVENT SHALL THE AUTHORS OR COPYRIGHT HOLDERS BE
# LIABLE FOR ANY CLAIM, DAMAGES OR OTHER LIABILITY, WHETHER IN AN ACTION
# OF CONTRACT, TORT OR OTHERWISE, ARISING FROM, OUT OF OR IN CONNECTION
# WITH THE SOFTWARE OR THE USE OR OTHER DEALINGS IN THE SOFTWARE.
#
# Uncomment and edit these for production use
# the full pathname is required for the certificates and
# private keys. Examples are below.
#
#export EC2_CERT=/home/ec2/etc/cert.pem
#export EC2_HOME=/home/ec2
#export EC2_PRIVATE_KEY=/home/ec2/etc/pk.pem
#export AWS_ACCOUNT_NUMBER=
#export AWS_ACCESS_KEY_ID=
#export AWS_SECRET_ACCESS_KEY=
#export AWS_BUCKET=
#export IMAGE_NAME=
echo "Hello $USER, Lets get started installing CentOS 5"
echo "........................................"
showOpts () {
echo "Please Select an Option or 8 to quit"
echo "0) Set EC2 Variables"
echo "1) Create and Mount Image"
echo "2) Installing Yum and CentOS 5 Base"
echo "3) Install Additional Packages"
echo "4) Install RightScale Customizations"
echo "5) Clean Up FileSystem and Bundle Image"
echo "6) Upload Image"
echo "7) Clean Up"
echo "8) Quit"
}
showEC2Opts () {
echo "Please Select an Option or 4 to quit"
echo "1) Set EC2 Variables"
echo "2) Show EC2 Variables"
echo "3) Set AWS Bucket & Image Name"
echo "4) Back"
}
while [ 1 ]
do
showOpts
read CHOICE
case "$CHOICE" in
"0")
while [ 1 ]
do
showEC2Opts
read EC2CHOICE
case "$EC2CHOICE" in
"1")
echo "Warning !!!"
echo "The full pathname is required for the Certificate"
echo "and Private Keys to work properly"
echo " "
echo "Please Enter Your Certificate Path"
read EC2_CERT_PATH
export EC2_CERT=$EC2_CERT_PATH
echo "Please Enter You Private Key Path"
read EC2_PRIVATE_KEY_PATH
export EC2_PRIVATE_KEY=$EC2_PRIVATE_KEY_PATH
echo "Please Enter Your AWS Account Number"
read AWS_ACCOUNT_NUMBER_TEMP
export AWS_ACCOUNT_NUMBER=$AWS_ACCOUNT_NUMBER_TEMP
echo "Please Enter Your AWS Access Key"
read AWS_ACCESS_KEY_ID_TEMP
export AWS_ACCESS_KEY_ID=$AWS_ACCESS_KEY_ID_TEMP
echo "Please Enter Your AWS Secret Access Key"
read AWS_SECRET_ACCESS_KEY_TEMP
export AWS_SECRET_ACCESS_KEY=$AWS_SECRET_ACCESS_KEY_TEMP
echo "Done"
;;
"2")
echo "------------Parameters-----------------------"
echo "EC2 Certificate Path:" $EC2_CERT
echo "EC2 Private Key Path:" $EC2_PRIVATE_KEY
echo "AWS Account Number:" $AWS_ACCOUNT_NUMBER
echo "AWS Access Key:" $AWS_ACCESS_KEY_ID
echo "AWS Secret Access Key:" $AWS_SECRET_ACCESS_KEY
echo "AWS Bucket:" $AWS_BUCKET
echo "Image Name:" $IMAGE_NAME
echo "------------End Parameters-------------------"
echo ""
;;
"3")
echo "Please enter in the AWS Bucket"
read AWS_BUCKET_TEMP
export AWS_BUCKET=$AWS_BUCKET_TEMP
echo "Please Enter Your Image Name ex: myfc6.img"
read IMAGE_NAME_TEMP
export IMAGE_NAME=$IMAGE_NAME_TEMP
showEC2Opts
;;
"4")
break
;;
esac
done
;;
"1")
echo "Creating 10GB Image"
mkdir /mnt/image
dd if=/dev/zero of=/mnt/image/$IMAGE_NAME bs=1M count=10240
echo "Creating File System"
mke2fs -F -j /mnt/image/$IMAGE_NAME
mkdir /mnt/ec2-fs
echo "Mounting File System in /mnt/ec2-fs"
mount -o loop /mnt/image/$IMAGE_NAME /mnt/ec2-fs
mkdir /mnt/ec2-fs/dev
/sbin/MAKEDEV -d /mnt/ec2-fs/dev -x console
/sbin/MAKEDEV -d /mnt/ec2-fs/dev -x null
/sbin/MAKEDEV -d /mnt/ec2-fs/dev -x zero
mkdir /mnt/ec2-fs/proc
mount -t proc none /mnt/ec2-fs/proc
mkdir /mnt/ec2-fs/etc
cat < /mnt/ec2-fs/etc/fstab
/dev/sda1 / ext3 defaults 1 1
/dev/sda2 /mnt ext3 defaults 1 2
/dev/sda3 swap swap defaults 0 0
none /dev/pts devpts gid=5,mode=620 0 0
none /dev/shm tmpfs defaults 0 0
none /proc proc defaults 0 0
none /sys sysfs defaults 0 0
EOL
echo "Finished Step 1"
;;
"2")
echo "Installing Yum 3.0"
wget http://linux.duke.edu/projects/yum/download/3.0/yum-3.0.5.tar.gz
tar -xvzf yum-3.0.5.tar.gz
cd yum-3.0.5
make DESTDIR=/ install
echo "Creating Yum Confuration"
mkdir -p /mnt/ec2-fs/sys/block
mkdir -p /mnt/ec2-fs/var/
mkdir -p /mnt/ec2-fs/var/log/
touch /mnt/ec2-fs/var/log/yum.log
cat < /mnt/image/yum.conf
[main]
cachedir=/var/cache/yum
debuglevel=2
logfile=/var/log/yum.log
exclude=*-debuginfo
gpgcheck=0
obsoletes=1
pkgpolicy=newest
distroverpkg=redhat-release
tolerant=1
exactarch=1
reposdir=/dev/null
metadata_expire=1800
[base]
name=CentOS 5 - $basearch - Base
baseurl=http://mirrors.kernel.org/centos/5.0/os/x86_64/
http://mirror.rightscale.com/centos/5/os/x86_64/
enabled=1
[updates-released]
name=CentOS 5 - $basearch - Released Updates
baseurl=http://mirrors.kernel.org/centos/5.0/updates/x86_64/
http://mirror.rightscale.com/centos/5/updates/x86_64/
enabled=1
[extras]
name=CentOS 5 Extras $releasever - $basearch
baseurl=http://mirror.centos.org/centos/5/extras/x86_64/
enabled=1
[epel]
name=Extra Packages for Enterprise Linux 5 - $basearch
baseurl=http://download.fedora.redhat.com/pub/epel/5/x86_64
mirrorlist=http://mirrors.fedoraproject.org/mirrorlist?repo=epel-5&arch=x86_64
failovermethod=priority
enabled=1
EOL
echo "Running Yum"
yum -c /mnt/image/yum.conf --installroot=/mnt/ec2-fs -y groupinstall Base
echo "Finished Step 2"
;;
"3")
echo "Starting Secondary Install"
yum -c /mnt/image/yum.conf --installroot=/mnt/ec2-fs -y install wget mlocate nano logrotate ruby* postfix openssl openssh openssh-askpass openssh-clients openssh-server curl gcc* zip unzip bison flex compat-libstdc++-296 cvs subversion autoconf automake libtool compat-gcc-34-g77 mutt sysstat rpm-build fping rrdtool rrdtool-devel rrdtool-doc rrdtool-perl rrdtool-python rrdtool-tcl vim-common vim-enhanced
yum -c /mnt/image/yum.conf --installroot=/mnt/ec2-fs -y clean packages
cat < /mnt/ec2-fs/etc/sysconfig/network
NETWORKING=yes
HOSTNAME=localhost.localdomain
EOL
cat < /mnt/ec2-fs/etc/sysconfig/network-scripts/ifcfg-eth0
ONBOOT=yes
DEVICE=eth0
BOOTPROTO=dhcp
EOL
cat <> /mnt/ec2-fs/etc/rc.local
touch /var/lock/subsys/local
# Update the EC2 AMI creation tools
echo " + Updating ec2-ami-tools"
curl -o /tmp/ec2-ami-tools.noarch.rpm http://s3.amazonaws.com/ec2-downloads/ec2-ami-tools.noarch.rpm && \
rpm -Uvh /tmp/ec2-ami-tools.noarch.rpm && \
echo " + Updated ec2-ami-tools"
if [ ! -d /root/.ssh ] ; then
mkdir -p /root/.ssh
chmod 700 /root/.ssh
fi
# Fetch public key using HTTP
curl -f http://169.254.169.254/latest/meta-data/public-keys/0/openssh-key > /tmp/my-key
if [ $? -eq 0 ] ; then
cat /tmp/my-key >> /root/.ssh/authorized_keys
chmod 600 /root/.ssh/authorized_keys
rm /tmp/my-key
fi
EOL
cat <> /mnt/ec2-fs/etc/ssh/sshd_config
UseDNS no
PermitRootLogin without-password
EOL
echo "Finished Step 3"
;;
"4")
echo "Adding RightScale"
mkdir -p /tmp/updates
mkdir -p /mnt/ec2-fs/opt/rightscale/
mkdir -p /mnt/ec2-fs/opt/rightscale/bin
mkdir -p /mnt/ec2-fs/opt/rightscale/etc
mkdir -p /mnt/ec2-fs/opt/rightscale/etc/init.d
mkdir -p /mnt/ec2-fs/opt/rightscale/lib
mkdir -p /mnt/ec2-fs/var/spool/ec2/
mkdir -p /mnt/ec2-fs/var/spool/ec2/meta-data
curl -o /tmp/updates/ec2-ami-tools.noarch.rpm http://s3.amazonaws.com/ec2-downloads/ec2-ami-tools.noarch.rpm
rpm -Uvh /tmp/updates/ec2-ami-tools.noarch.rpm --force --nodeps
#fetch needed packages
echo "Fetch Needed Packages"
curl -o /tmp/updates/linux-2.6.16.33-ec2.tgz http://s3.amazonaws.com/ec2-downloads/linux-2.6.16.33-ec2.tgz
curl -o /tmp/updates/kernel-modules.2.6.16-xenU.tgz http://s3.amazonaws.com/rightscale_software/kernel-modules-2.6.16.33-xenU.tgz
tar -xvzf /tmp/updates/kernel-modules.2.6.16-xenU.tgz -C /mnt/ec2-fs/lib/modules/
#chroot Section
echo "Chroot Time"
mkdir -p /mnt/ec2-fs/tmp/updates
touch /mnt/ec2-fs/etc/mtab
cp -R /tmp/updates/ /mnt/ec2-fs/tmp/
#get rrd-tool
#curl -o /mnt/ec2-fs/tmp/updates/rrdtool-1.2.23-5.i386.rpm http://s3.amazonaws.com/rightscale_software/centos/rrdtool-1.2.23-5.i386.rpm
#curl -o /mnt/ec2-fs/tmp/updates/rrdtool-devel-1.2.23-5.i386.rpm http://s3.amazonaws.com/rightscale_software/centos/rrdtool-devel-1.2.23-5.i386.rpm
#curl -o /mnt/ec2-fs/tmp/updates/rrdtool-doc-1.2.23-5.i386.rpm http://s3.amazonaws.com/rightscale_software/centos/rrdtool-doc-1.2.23-5.i386.rpm
#curl -o /mnt/ec2-fs/tmp/updates/rrdtool-perl-1.2.23-5.i386.rpm http://s3.amazonaws.com/rightscale_software/centos/rrdtool-perl-1.2.23-5.i386.rpm
#curl -o /mnt/ec2-fs/tmp/updates/rrdtool-php-1.2.23-5.i386.rpm http://s3.amazonaws.com/rightscale_software/centos/rrdtool-php-1.2.23-5.i386.rpm
#curl -o /mnt/ec2-fs/tmp/updates/rrdtool-python-1.2.23-5.i386.rpm http://s3.amazonaws.com/rightscale_software/centos/rrdtool-python-1.2.23-5.i386.rpm
#curl -o /mnt/ec2-fs/tmp/updates/rrdtool-ruby-1.2.23-5.i386.rpm http://s3.amazonaws.com/rightscale_software/centos/rrdtool-ruby-1.2.23-5.i386.rpm
#curl -o /mnt/ec2-fs/tmp/updates/rrdtool-tcl-1.2.23-5.i386.rpm http://s3.amazonaws.com/rightscale_software/centos/rrdtool-tcl-1.2.23-5.i386.rpm
#get EPEL
curl -o /mnt/ec2-fs/tmp/updates/epel-release-5-2.noarch.rpm http://s3.amazonaws.com/rightscale_scripts/epel-release-5-2.noarch.rpm
cat < <'EOL' > /mnt/ec2-fs/tmp/updates/install-script
echo "starting install"
echo "127.0.0.1 localhost localhost.localdomain" > /etc/hosts
authconfig --enableshadow --useshadow --enablemd5 --updateall
mv /lib/tls /lib/tls.disabled
echo "Disabling TTYs"
perl -p -i -e 's/(.*tty2)/#\1/' /etc/inittab
perl -p -i -e 's/(.*tty3)/#\1/' /etc/inittab
perl -p -i -e 's/(.*tty4)/#\1/' /etc/inittab
perl -p -i -e 's/(.*tty5)/#\1/' /etc/inittab
perl -p -i -e 's/(.*tty6)/#\1/' /etc/inittab
perl -p -i -e 's/PasswordAuthentication yes/PasswordAuthentication no/' /etc/ssh/sshd_config
perl -p -i -e 's/#ClientAliveInterval 0/ClientAliveInterval 60/' /etc/ssh/sshd_config
perl -p -i -e 's/#ClientAliveCountMax 3/ClientAliveCountMax 240/' /etc/ssh/sshd_config
service network start
echo "Fetching RightScale"
cat < <'SSH' >/etc/init.d/getsshkey
#!/bin/bash
# chkconfig: 4 11 11
# description: This script fetches the ssh key early. \
#
# Source function library.
. /etc/rc.d/init.d/functions
# Source networking configuration.
[ -r /etc/sysconfig/network ] && . /etc/sysconfig/network
# Check that networking is up.
[ "${NETWORKING}" = "no" ] && exit 1
start() {
if [ ! -d /root/.ssh ] ; then
mkdir -p /root/.ssh
chmod 700 /root/.ssh
fi
# Fetch public key using HTTP
curl -f http://169.254.169.254/latest/meta-data/public-keys/0/openssh-key > /tmp/my-key
if [ $? -eq 0 ] ; then
cat /tmp/my-key >> /root/.ssh/authorized_keys
chmod 600 /root/.ssh/authorized_keys
rm /tmp/my-key
fi
# or fetch public key using the file in the ephemeral store:
if [ -e /mnt/openssh_id.pub ] ; then
cat /mnt/openssh_id.pub >> /root/.ssh/authorized_keys
chmod 600 /root/.ssh/authorized_keys
fi
}
stop() {
echo "Nothing to do here"
}
restart() {
stop
start
}
# See how we were called.
case "$1" in
start)
start
;;
stop)
stop
;;
restart)
restart
;;
*)
echo $"Usage: $0 {start|stop}"
exit 1
esac
exit $?
SSH
chmod +x /etc/init.d/getsshkey
rpm -Uvh http://s3.amazonaws.com/rightscale_scripts/syslog-ng-1.6.12-1.x86_64.rpm
curl -o /opt/rightscale_scripts.tgz http://s3.amazonaws.com/rightscale_scripts/rightscale_scripts.tgz
tar -xvzf /opt/rightscale_scripts.tgz -C /opt/
ln /opt/rightscale/etc/init.d/rightscale /etc/init.d/rightscale
chmod +x /opt/rightscale/etc/init.d/rightscale
chmod +x /etc/init.d/rightscale
echo "Modifying Services"
chkconfig --add rightscale
chkconfig --add postfix
chkconfig --add getsshkey
chkconfig --level 4 getsshkey on
chkconfig --level 4 rightscale on
chkconfig --level 4 postfix on
chkconfig --level 4 psacct on
chkconfig --level 4 syslog-ng on
chkconfig --level 4 smartd off
chkconfig --level 4 anacron off
chkconfig --level 4 avahi-daemon off
chkconfig --level 4 avahi-dnsconfd off
chkconfig --level 4 apmd off
chkconfig --level 4 acpid off
chkconfig --level 4 auditd off
chkconfig --level 4 irqbalance off
chkconfig --level 4 mdmpd off
chkconfig --level 4 portmap off
chkconfig --level 4 nfslock off
chkconfig --level 4 syslog off
chkconfig --level 4 sendmail off
chkconfig --level 4 cpuspeed off
chkconfig --level 4 cups off
chkconfig --level 4 autofs off
chkconfig --level 4 bluetooth off
chkconfig --level 4 rpcidmapd off
chkconfig --level 4 rpcsvcgssd off
chkconfig --level 4 rpcgssd off
chkconfig --level 4 pcscd off
chkconfig --level 4 gpm off
chkconfig --level 4 hidd off
chkconfig --level 4 xfs off
chkconfig --level 4 yum-updatesd off
chkconfig --del avahi-daemon
chkconfig --del acpid
chkconfig --del auditd
chkconfig --del irqbalance
chkconfig --del mdmpd
chkconfig --del avahi-dnsconfd
chkconfig --del NetworkManager
chkconfig --del NetworkManagerDispatcher
chkconfig --del dhcdbd
chkconfig --del dund
chkconfig --del firstboot
chkconfig --del irda
chkconfig --del apmd
chkconfig --del smartd
chkconfig --del kudzu
chkconfig --del hidd
chkconfig --del gpm
chkconfig --del pcscd
chkconfig --del bluetooth
chkconfig --del cpuspeed
chkconfig --del cups
chkconfig --del rdisc
chkconfig --del sendmail
chkconfig --del readahead_later
chkconfig --del syslog
chkconfig --del wpa_supplicant
chkconfig --del pand
chkconfig --del netplugd
echo "Fetching Java"
curl -o /tmp/updates/jdk-6u2-linux-amd64.rpm http://s3.amazonaws.com/rightscale_software/jdk-6u2-linux-amd64.rpm
curl -o /tmp/updates/sun-javadb-client-10.2.2-0.1.i386.rpm http://s3.amazonaws.com/rightscale_software/sun-javadb-client-10.2.2-0.1.i386.rpm
curl -o /tmp/updates/sun-javadb-common-10.2.2-0.1.i386.rpm http://s3.amazonaws.com/rightscale_software/sun-javadb-common-10.2.2-0.1.i386.rpm
curl -o /tmp/updates/sun-javadb-core-10.2.2-0.1.i386.rpm http://s3.amazonaws.com/rightscale_software/sun-javadb-core-10.2.2-0.1.i386.rpm
curl -o /tmp/updates/sun-javadb-demo-10.2.2-0.1.i386.rpm http://s3.amazonaws.com/rightscale_software/sun-javadb-demo-10.2.2-0.1.i386.rpm
curl -o /tmp/updates/sun-javadb-docs-10.2.2-0.1.i386.rpm http://s3.amazonaws.com/rightscale_software/sun-javadb-docs-10.2.2-0.1.i386.rpm
curl -o /tmp/updates/sun-javadb-javadoc-10.2.2-0.1.i386.rpm http://s3.amazonaws.com/rightscale_software/sun-javadb-javadoc-10.2.2-0.1.i386.rpm
echo "Installing Software"
cd /tmp/updates
curl -o /tmp/updates/bwm-ng-0.5-1.x86_64.rpm http://s3.amazonaws.com/rightscale_software/bwm-ng-0.5-1.x86_64.rpm
rpm -Uvh /tmp/updates/*.rpm --nodeps --force
tar -xvzf linux-2.6.16.33-ec2.tgz
mv linux-2.6.16.33-xenU/ /usr/src/
ln -sf /usr/src/linux-2.6.16.33-xenU/include/acpi /usr/include/acpi
ln -sf /usr/src/linux-2.6.16.33-xenU/include/asm /usr/include/asm
ln -sf /usr/src/linux-2.6.16.33-xenU/include/asm /usr/include/asm-generic
ln -sf /usr/src/linux-2.6.16.33-xenU/include/config /usr/include/config
ln -sf /usr/src/linux-2.6.16.33-xenU/include/keys /usr/include/keys
ln -sf /usr/src/linux-2.6.16.33-xenU/include/linux /usr/include/linux
ln -sf /usr/src/linux-2.6.16.33-xenU/include/math-emu /usr/include/math-emu
ln -sf /usr/src/linux-2.6.16.33-xenU/include/media /usr/include/media
ln -sf /usr/src/linux-2.6.16.33-xenU/include/mtd /usr/include/mtd
ln -sf /usr/src/linux-2.6.16.33-xenU/include/pcmcia /usr/include/pcmcia
ln -sf /usr/src/linux-2.6.16.33-xenU/include/rdma /usr/include/rdma
ln -sf /usr/src/linux-2.6.16.33-xenU/include/rxrpc /usr/include/rxrpc
ln -sf /usr/src/linux-2.6.16.33-xenU/include/sound /usr/include/sound
ln -sf /usr/src/linux-2.6.16.33-xenU/include/video /usr/include/video
ln -sf /usr/src/linux-2.6.16.33-xenU/include/xen /usr/include/xen
echo "Configuring Java Home"
echo "export JAVA_HOME=/usr/java/default" >> /etc/profile.d/java.sh
chmod +x /etc/profile.d/java.sh
echo "Add EC2 Tools"
mkdir /home/ec2
mkdir /home/ec2/etc
curl -o /tmp/ec2-api-tools.zip http://s3.amazonaws.com/rightscale_software/ec2-api-tools.zip
unzip /tmp/ec2-api-tools.zip -d /tmp/
mv /tmp/ec2-api-tools-1.2-13740/* /home/ec2/
ln -sf /usr/lib/site_ruby/aes/ /usr/lib/ruby/site_ruby/1.8/aes
rm -fr /tmp/ec2*
chmod -R o-w /home/ec2
echo "More EC2 Mods"
cat < <'PROMPT'> /etc/profile.d/prompt.sh
PS1="[\u@\h:\w] "
PROMPT
chmod +x /etc/profile.d/prompt.sh
cat < <'EC2'> /etc/profile.d/ec2.sh
export EC2_HOME=/home/ec2
export EC2_CERT=
export EC2_PRIVATE_KEY=
export AWS_ACCOUNT_NUMBER=
export AWS_ACCESS_KEY_ID=
export AWS_SECRET_ACCESS_KEY=
export PATH=$PATH:/home/ec2/bin/
EC2
chmod +x /etc/profile.d/ec2.sh
ln -f /opt/rightscale/etc/motd /etc/motd
echo "RubyGems"
wget http://rubyforge.org/frs/download.php/20989/rubygems-0.9.4.tgz
tar -xvzf rubygems-0.9.4.tgz
cd rubygems-0.9.4
ruby setup.rb
gem update
gem source -a http://mirror.rightscale.com
#cat < <'GEM'> /root/.gemrc
#gem: --source http://mirror.rightscale.com
#GEM
mkdir -p /tmp/updates
curl -o /tmp/updates/s3sync.gem http://s3.amazonaws.com/rightscale_software/s3sync-1.1.4.gem
gem install /tmp/updates/s3sync.gem
gem install xml-simple net-ssh net-sftp -y
updatedb
cat < /etc/cron.daily/do_amitools_update.sh
#!/bin/bash
#
# do_amitools_update.sh: updates ami-tools to the latest version..
#
## Include Files:
. /var/spool/ec2/meta-data.sh
. /var/spool/ec2/user-data.sh
# Update the EC2 AMI creation tools
echo " + Updating ec2-ami-tools"
curl -o /tmp/ec2-ami-tools.noarch.rpm http://s3.amazonaws.com/ec2-downloads/ec2-ami-tools.noarch.rpm && \
rpm -Uvh /tmp/ec2-ami-tools.noarch.rpm && \
echo " + Updated ec2-ami-tools"
## Cleanup FileSystem
rm -f /tmp/ec2-ami-tools.noarch.rpm
rm -f /tmp/ec2-ami-tools.noarch.rpm.*
AMI
chmod +x /etc/cron.daily/do_amitools_update.sh
cat < <'YUM'> /etc/yum.repos.d/CentOS-Base.repo
# CentOS-Base.repo
#
# This file uses a new mirrorlist system developed by Lance Davis for CentOS.
# The mirror system uses the connecting IP address of the client and the
# update status of each mirror to pick mirrors that are updated to and
# geographically close to the client. You should use this for CentOS updates
# unless you are manually picking other mirrors.
#
# If the mirrorlist= does not work for you, as a fall back you can try the
# remarked out baseurl= line instead.
#
#
[base]
name=CentOS-$releasever - Base
baseurl=http://mirror.rightscale.com/centos/$releasever/os/$basearch/
http://mirrors.kernel.org/centos/$releasever/os/$basearch/
mirrorlist=http://mirrorlist.centos.org/?release=$releasever&arch=$basearch&repo=os
failovermethod=priority
gpgcheck=1
enabled=1
gpgkey=http://mirror.centos.org/centos/RPM-GPG-KEY-CentOS-5
[updates]
name=CentOS-$releasever - Updates
baseurl=http://mirror.rightscale.com/centos/$releasever/updates/$basearch/
http://mirrors.kernel.org/centos/$releasever/updates/$basearch/
mirrorlist=http://mirrorlist.centos.org/?release=$releasever&arch=$basearch&repo=updates
failovermethod=priority
enabled=1
gpgcheck=1
gpgkey=http://mirror.centos.org/centos/RPM-GPG-KEY-CentOS-5
#packages used/produced in the build but not released
[addons]
name=CentOS-$releasever - Addons
mirrorlist=http://mirrorlist.centos.org/?release=$releasever&arch=$basearch&repo=addons
#baseurl=http://mirror.centos.org/centos/$releasever/addons/$basearch/
gpgcheck=1
gpgkey=http://mirror.centos.org/centos/RPM-GPG-KEY-CentOS-5
#additional packages that may be useful
[extras]
name=CentOS-$releasever - Extras
mirrorlist=http://mirrorlist.centos.org/?release=$releasever&arch=$basearch&repo=extras
#baseurl=http://mirror.centos.org/centos/$releasever/extras/$basearch/
gpgcheck=1
gpgkey=http://mirror.centos.org/centos/RPM-GPG-KEY-CentOS-5
#additional packages that extend functionality of existing packages
[centosplus]
name=CentOS-$releasever - Plus
mirrorlist=http://mirrorlist.centos.org/?release=$releasever&arch=$basearch&repo=centosplus
#baseurl=http://mirror.centos.org/centos/$releasever/centosplus/$basearch/
gpgcheck=1
enabled=0
gpgkey=http://mirror.centos.org/centos/RPM-GPG-KEY-CentOS-5
#contrib - packages by Centos Users
[contrib]
name=CentOS-$releasever - Contrib
mirrorlist=http://mirrorlist.centos.org/?release=$releasever&arch=$basearch&repo=contrib
#baseurl=http://mirror.centos.org/centos/$releasever/contrib/$basearch/
gpgcheck=1
enabled=0
gpgkey=http://mirror.centos.org/centos/RPM-GPG-KEY-CentOS-5
YUM
cat < <'EOF'> /root/.bashrc
# .bashrc
# User specific aliases and functions
alias rm='rm -i'
alias cp='cp -i'
alias mv='mv -i'
# Source global definitions
if [ -f /etc/bashrc ]; then
. /etc/bashrc
fi
EOF
cat < <'EOF'> /root/.bash_profile
# .bash_profile
# Get the aliases and functions
if [ -f ~/.bashrc ]; then
. ~/.bashrc
fi
# User specific environment and startup programs
PATH=$PATH:$HOME/bin
export PATH
unset USERNAME
EOF
cat < <'EOF'> /root/.bash_logout
# ~/.bash_logout
clear
EOF
touch /root/.bash_logout
exit
EOL
chmod +x /mnt/ec2-fs/tmp/updates/install-script
chroot /mnt/ec2-fs/ /tmp/updates/install-script
echo "all Done"
echo "Cleaning up Image"
rm -fr /mnt/ec2-fs/tmp/updates
echo "Finished Step 4"
;;
"5")
echo "Prepping for upload"
sync
#umount -dlf /mnt/ec2-fs/proc
#umount -dlf /mnt/ec2-fs
echo "Bundling Image"
#ec2-bundle-image -i /mnt/image/$IMAGE_NAME -k $EC2_PRIVATE_KEY -c $EC2_CERT -u $AWS_ACCOUNT_NUMBER
mkdir -p /mnt/tmp
ec2-bundle-vol -v /mnt/ec2-fs -d /mnt/tmp -p $IMAGE_NAME -k $EC2_PRIVATE_KEY -c $EC2_CERT -u $AWS_ACCOUNT_NUMBER
echo "Finished Step 5"
;;
"6")
echo "Uploading"
ec2-upload-bundle -b $AWS_BUCKET -m /mnt/tmp/$IMAGE_NAME.manifest.xml -a $AWS_ACCESS_KEY_ID -s $AWS_SECRET_ACCESS_KEY
echo "Finished Step 6"
;;
"7")
echo "Cleanup"
umount /mnt/ec2-fs/proc
umount /mnt/ec2-fs
rm -fr /mnt/image/
rm -fr /mnt/ec2-fs
echo "File System Cleaned"
echo "Finished Step 7"
;;
"8")
exit
;;
esac
done
# Copyright (c) 2007 RightScale Inc.
#
# Permission is hereby granted, free of charge, to any person obtaining
# a copy of this software and associated documentation files (the
# "Software"), to deal in the Software without restriction, including
# without limitation the rights to use, copy, modify, merge, publish,
# distribute, sublicense, and/or sell copies of the Software, and to
# permit persons to whom the Software is furnished to do so, subject to
# the following conditions:
#
# The above copyright notice and this permission notice shall be
# included in all copies or substantial portions of the Software.
#
# THE SOFTWARE IS PROVIDED "AS IS", WITHOUT WARRANTY OF ANY KIND,
# EXPRESS OR IMPLIED, INCLUDING BUT NOT LIMITED TO THE WARRANTIES OF
# MERCHANTABILITY, FITNESS FOR A PARTICULAR PURPOSE AND
# NONINFRINGEMENT. IN NO EVENT SHALL THE AUTHORS OR COPYRIGHT HOLDERS BE
# LIABLE FOR ANY CLAIM, DAMAGES OR OTHER LIABILITY, WHETHER IN AN ACTION
# OF CONTRACT, TORT OR OTHERWISE, ARISING FROM, OUT OF OR IN CONNECTION
# WITH THE SOFTWARE OR THE USE OR OTHER DEALINGS IN THE SOFTWARE.
#
# Uncomment and edit these for production use
# the full pathname is required for the certificates and
# private keys. Examples are below.
#
#export EC2_CERT=/home/ec2/etc/cert.pem
#export EC2_HOME=/home/ec2
#export EC2_PRIVATE_KEY=/home/ec2/etc/pk.pem
#export AWS_ACCOUNT_NUMBER=
#export AWS_ACCESS_KEY_ID=
#export AWS_SECRET_ACCESS_KEY=
#export AWS_BUCKET=
#export IMAGE_NAME=
echo "Hello $USER, Lets get started installing CentOS 5"
echo "........................................"
showOpts () {
echo "Please Select an Option or 8 to quit"
echo "0) Set EC2 Variables"
echo "1) Create and Mount Image"
echo "2) Installing Yum and CentOS 5 Base"
echo "3) Install Additional Packages"
echo "4) Install RightScale Customizations"
echo "5) Clean Up FileSystem and Bundle Image"
echo "6) Upload Image"
echo "7) Clean Up"
echo "8) Quit"
}
showEC2Opts () {
echo "Please Select an Option or 4 to quit"
echo "1) Set EC2 Variables"
echo "2) Show EC2 Variables"
echo "3) Set AWS Bucket & Image Name"
echo "4) Back"
}
while [ 1 ]
do
showOpts
read CHOICE
case "$CHOICE" in
"0")
while [ 1 ]
do
showEC2Opts
read EC2CHOICE
case "$EC2CHOICE" in
"1")
echo "Warning !!!"
echo "The full pathname is required for the Certificate"
echo "and Private Keys to work properly"
echo " "
echo "Please Enter Your Certificate Path"
read EC2_CERT_PATH
export EC2_CERT=$EC2_CERT_PATH
echo "Please Enter You Private Key Path"
read EC2_PRIVATE_KEY_PATH
export EC2_PRIVATE_KEY=$EC2_PRIVATE_KEY_PATH
echo "Please Enter Your AWS Account Number"
read AWS_ACCOUNT_NUMBER_TEMP
export AWS_ACCOUNT_NUMBER=$AWS_ACCOUNT_NUMBER_TEMP
echo "Please Enter Your AWS Access Key"
read AWS_ACCESS_KEY_ID_TEMP
export AWS_ACCESS_KEY_ID=$AWS_ACCESS_KEY_ID_TEMP
echo "Please Enter Your AWS Secret Access Key"
read AWS_SECRET_ACCESS_KEY_TEMP
export AWS_SECRET_ACCESS_KEY=$AWS_SECRET_ACCESS_KEY_TEMP
echo "Done"
;;
"2")
echo "------------Parameters-----------------------"
echo "EC2 Certificate Path:" $EC2_CERT
echo "EC2 Private Key Path:" $EC2_PRIVATE_KEY
echo "AWS Account Number:" $AWS_ACCOUNT_NUMBER
echo "AWS Access Key:" $AWS_ACCESS_KEY_ID
echo "AWS Secret Access Key:" $AWS_SECRET_ACCESS_KEY
echo "AWS Bucket:" $AWS_BUCKET
echo "Image Name:" $IMAGE_NAME
echo "------------End Parameters-------------------"
echo ""
;;
"3")
echo "Please enter in the AWS Bucket"
read AWS_BUCKET_TEMP
export AWS_BUCKET=$AWS_BUCKET_TEMP
echo "Please Enter Your Image Name ex: myfc6.img"
read IMAGE_NAME_TEMP
export IMAGE_NAME=$IMAGE_NAME_TEMP
showEC2Opts
;;
"4")
break
;;
esac
done
;;
"1")
echo "Creating 10GB Image"
mkdir /mnt/image
dd if=/dev/zero of=/mnt/image/$IMAGE_NAME bs=1M count=10240
echo "Creating File System"
mke2fs -F -j /mnt/image/$IMAGE_NAME
mkdir /mnt/ec2-fs
echo "Mounting File System in /mnt/ec2-fs"
mount -o loop /mnt/image/$IMAGE_NAME /mnt/ec2-fs
mkdir /mnt/ec2-fs/dev
/sbin/MAKEDEV -d /mnt/ec2-fs/dev -x console
/sbin/MAKEDEV -d /mnt/ec2-fs/dev -x null
/sbin/MAKEDEV -d /mnt/ec2-fs/dev -x zero
mkdir /mnt/ec2-fs/proc
mount -t proc none /mnt/ec2-fs/proc
mkdir /mnt/ec2-fs/etc
cat <
/dev/sda1 / ext3 defaults 1 1
/dev/sda2 /mnt ext3 defaults 1 2
/dev/sda3 swap swap defaults 0 0
none /dev/pts devpts gid=5,mode=620 0 0
none /dev/shm tmpfs defaults 0 0
none /proc proc defaults 0 0
none /sys sysfs defaults 0 0
EOL
echo "Finished Step 1"
;;
"2")
echo "Installing Yum 3.0"
wget http://linux.duke.edu/projects/yum/download/3.0/yum-3.0.5.tar.gz
tar -xvzf yum-3.0.5.tar.gz
cd yum-3.0.5
make DESTDIR=/ install
echo "Creating Yum Confuration"
mkdir -p /mnt/ec2-fs/sys/block
mkdir -p /mnt/ec2-fs/var/
mkdir -p /mnt/ec2-fs/var/log/
touch /mnt/ec2-fs/var/log/yum.log
cat <
[main]
cachedir=/var/cache/yum
debuglevel=2
logfile=/var/log/yum.log
exclude=*-debuginfo
gpgcheck=0
obsoletes=1
pkgpolicy=newest
distroverpkg=redhat-release
tolerant=1
exactarch=1
reposdir=/dev/null
metadata_expire=1800
[base]
name=CentOS 5 - $basearch - Base
baseurl=http://mirrors.kernel.org/centos/5.0/os/x86_64/
http://mirror.rightscale.com/centos/5/os/x86_64/
enabled=1
[updates-released]
name=CentOS 5 - $basearch - Released Updates
baseurl=http://mirrors.kernel.org/centos/5.0/updates/x86_64/
http://mirror.rightscale.com/centos/5/updates/x86_64/
enabled=1
[extras]
name=CentOS 5 Extras $releasever - $basearch
baseurl=http://mirror.centos.org/centos/5/extras/x86_64/
enabled=1
[epel]
name=Extra Packages for Enterprise Linux 5 - $basearch
baseurl=http://download.fedora.redhat.com/pub/epel/5/x86_64
mirrorlist=http://mirrors.fedoraproject.org/mirrorlist?repo=epel-5&arch=x86_64
failovermethod=priority
enabled=1
EOL
echo "Running Yum"
yum -c /mnt/image/yum.conf --installroot=/mnt/ec2-fs -y groupinstall Base
echo "Finished Step 2"
;;
"3")
echo "Starting Secondary Install"
yum -c /mnt/image/yum.conf --installroot=/mnt/ec2-fs -y install wget mlocate nano logrotate ruby* postfix openssl openssh openssh-askpass openssh-clients openssh-server curl gcc* zip unzip bison flex compat-libstdc++-296 cvs subversion autoconf automake libtool compat-gcc-34-g77 mutt sysstat rpm-build fping rrdtool rrdtool-devel rrdtool-doc rrdtool-perl rrdtool-python rrdtool-tcl vim-common vim-enhanced
yum -c /mnt/image/yum.conf --installroot=/mnt/ec2-fs -y clean packages
cat <
NETWORKING=yes
HOSTNAME=localhost.localdomain
EOL
cat <
ONBOOT=yes
DEVICE=eth0
BOOTPROTO=dhcp
EOL
cat <
touch /var/lock/subsys/local
# Update the EC2 AMI creation tools
echo " + Updating ec2-ami-tools"
curl -o /tmp/ec2-ami-tools.noarch.rpm http://s3.amazonaws.com/ec2-downloads/ec2-ami-tools.noarch.rpm && \
rpm -Uvh /tmp/ec2-ami-tools.noarch.rpm && \
echo " + Updated ec2-ami-tools"
if [ ! -d /root/.ssh ] ; then
mkdir -p /root/.ssh
chmod 700 /root/.ssh
fi
# Fetch public key using HTTP
curl -f http://169.254.169.254/latest/meta-data/public-keys/0/openssh-key > /tmp/my-key
if [ $? -eq 0 ] ; then
cat /tmp/my-key >> /root/.ssh/authorized_keys
chmod 600 /root/.ssh/authorized_keys
rm /tmp/my-key
fi
EOL
cat <
UseDNS no
PermitRootLogin without-password
EOL
echo "Finished Step 3"
;;
"4")
echo "Adding RightScale"
mkdir -p /tmp/updates
mkdir -p /mnt/ec2-fs/opt/rightscale/
mkdir -p /mnt/ec2-fs/opt/rightscale/bin
mkdir -p /mnt/ec2-fs/opt/rightscale/etc
mkdir -p /mnt/ec2-fs/opt/rightscale/etc/init.d
mkdir -p /mnt/ec2-fs/opt/rightscale/lib
mkdir -p /mnt/ec2-fs/var/spool/ec2/
mkdir -p /mnt/ec2-fs/var/spool/ec2/meta-data
curl -o /tmp/updates/ec2-ami-tools.noarch.rpm http://s3.amazonaws.com/ec2-downloads/ec2-ami-tools.noarch.rpm
rpm -Uvh /tmp/updates/ec2-ami-tools.noarch.rpm --force --nodeps
#fetch needed packages
echo "Fetch Needed Packages"
curl -o /tmp/updates/linux-2.6.16.33-ec2.tgz http://s3.amazonaws.com/ec2-downloads/linux-2.6.16.33-ec2.tgz
curl -o /tmp/updates/kernel-modules.2.6.16-xenU.tgz http://s3.amazonaws.com/rightscale_software/kernel-modules-2.6.16.33-xenU.tgz
tar -xvzf /tmp/updates/kernel-modules.2.6.16-xenU.tgz -C /mnt/ec2-fs/lib/modules/
#chroot Section
echo "Chroot Time"
mkdir -p /mnt/ec2-fs/tmp/updates
touch /mnt/ec2-fs/etc/mtab
cp -R /tmp/updates/ /mnt/ec2-fs/tmp/
#get rrd-tool
#curl -o /mnt/ec2-fs/tmp/updates/rrdtool-1.2.23-5.i386.rpm http://s3.amazonaws.com/rightscale_software/centos/rrdtool-1.2.23-5.i386.rpm
#curl -o /mnt/ec2-fs/tmp/updates/rrdtool-devel-1.2.23-5.i386.rpm http://s3.amazonaws.com/rightscale_software/centos/rrdtool-devel-1.2.23-5.i386.rpm
#curl -o /mnt/ec2-fs/tmp/updates/rrdtool-doc-1.2.23-5.i386.rpm http://s3.amazonaws.com/rightscale_software/centos/rrdtool-doc-1.2.23-5.i386.rpm
#curl -o /mnt/ec2-fs/tmp/updates/rrdtool-perl-1.2.23-5.i386.rpm http://s3.amazonaws.com/rightscale_software/centos/rrdtool-perl-1.2.23-5.i386.rpm
#curl -o /mnt/ec2-fs/tmp/updates/rrdtool-php-1.2.23-5.i386.rpm http://s3.amazonaws.com/rightscale_software/centos/rrdtool-php-1.2.23-5.i386.rpm
#curl -o /mnt/ec2-fs/tmp/updates/rrdtool-python-1.2.23-5.i386.rpm http://s3.amazonaws.com/rightscale_software/centos/rrdtool-python-1.2.23-5.i386.rpm
#curl -o /mnt/ec2-fs/tmp/updates/rrdtool-ruby-1.2.23-5.i386.rpm http://s3.amazonaws.com/rightscale_software/centos/rrdtool-ruby-1.2.23-5.i386.rpm
#curl -o /mnt/ec2-fs/tmp/updates/rrdtool-tcl-1.2.23-5.i386.rpm http://s3.amazonaws.com/rightscale_software/centos/rrdtool-tcl-1.2.23-5.i386.rpm
#get EPEL
curl -o /mnt/ec2-fs/tmp/updates/epel-release-5-2.noarch.rpm http://s3.amazonaws.com/rightscale_scripts/epel-release-5-2.noarch.rpm
cat < <'EOL' > /mnt/ec2-fs/tmp/updates/install-script
echo "starting install"
echo "127.0.0.1 localhost localhost.localdomain" > /etc/hosts
authconfig --enableshadow --useshadow --enablemd5 --updateall
mv /lib/tls /lib/tls.disabled
echo "Disabling TTYs"
perl -p -i -e 's/(.*tty2)/#\1/' /etc/inittab
perl -p -i -e 's/(.*tty3)/#\1/' /etc/inittab
perl -p -i -e 's/(.*tty4)/#\1/' /etc/inittab
perl -p -i -e 's/(.*tty5)/#\1/' /etc/inittab
perl -p -i -e 's/(.*tty6)/#\1/' /etc/inittab
perl -p -i -e 's/PasswordAuthentication yes/PasswordAuthentication no/' /etc/ssh/sshd_config
perl -p -i -e 's/#ClientAliveInterval 0/ClientAliveInterval 60/' /etc/ssh/sshd_config
perl -p -i -e 's/#ClientAliveCountMax 3/ClientAliveCountMax 240/' /etc/ssh/sshd_config
service network start
echo "Fetching RightScale"
cat < <'SSH' >/etc/init.d/getsshkey
#!/bin/bash
# chkconfig: 4 11 11
# description: This script fetches the ssh key early. \
#
# Source function library.
. /etc/rc.d/init.d/functions
# Source networking configuration.
[ -r /etc/sysconfig/network ] && . /etc/sysconfig/network
# Check that networking is up.
[ "${NETWORKING}" = "no" ] && exit 1
start() {
if [ ! -d /root/.ssh ] ; then
mkdir -p /root/.ssh
chmod 700 /root/.ssh
fi
# Fetch public key using HTTP
curl -f http://169.254.169.254/latest/meta-data/public-keys/0/openssh-key > /tmp/my-key
if [ $? -eq 0 ] ; then
cat /tmp/my-key >> /root/.ssh/authorized_keys
chmod 600 /root/.ssh/authorized_keys
rm /tmp/my-key
fi
# or fetch public key using the file in the ephemeral store:
if [ -e /mnt/openssh_id.pub ] ; then
cat /mnt/openssh_id.pub >> /root/.ssh/authorized_keys
chmod 600 /root/.ssh/authorized_keys
fi
}
stop() {
echo "Nothing to do here"
}
restart() {
stop
start
}
# See how we were called.
case "$1" in
start)
start
;;
stop)
stop
;;
restart)
restart
;;
*)
echo $"Usage: $0 {start|stop}"
exit 1
esac
exit $?
SSH
chmod +x /etc/init.d/getsshkey
rpm -Uvh http://s3.amazonaws.com/rightscale_scripts/syslog-ng-1.6.12-1.x86_64.rpm
curl -o /opt/rightscale_scripts.tgz http://s3.amazonaws.com/rightscale_scripts/rightscale_scripts.tgz
tar -xvzf /opt/rightscale_scripts.tgz -C /opt/
ln /opt/rightscale/etc/init.d/rightscale /etc/init.d/rightscale
chmod +x /opt/rightscale/etc/init.d/rightscale
chmod +x /etc/init.d/rightscale
echo "Modifying Services"
chkconfig --add rightscale
chkconfig --add postfix
chkconfig --add getsshkey
chkconfig --level 4 getsshkey on
chkconfig --level 4 rightscale on
chkconfig --level 4 postfix on
chkconfig --level 4 psacct on
chkconfig --level 4 syslog-ng on
chkconfig --level 4 smartd off
chkconfig --level 4 anacron off
chkconfig --level 4 avahi-daemon off
chkconfig --level 4 avahi-dnsconfd off
chkconfig --level 4 apmd off
chkconfig --level 4 acpid off
chkconfig --level 4 auditd off
chkconfig --level 4 irqbalance off
chkconfig --level 4 mdmpd off
chkconfig --level 4 portmap off
chkconfig --level 4 nfslock off
chkconfig --level 4 syslog off
chkconfig --level 4 sendmail off
chkconfig --level 4 cpuspeed off
chkconfig --level 4 cups off
chkconfig --level 4 autofs off
chkconfig --level 4 bluetooth off
chkconfig --level 4 rpcidmapd off
chkconfig --level 4 rpcsvcgssd off
chkconfig --level 4 rpcgssd off
chkconfig --level 4 pcscd off
chkconfig --level 4 gpm off
chkconfig --level 4 hidd off
chkconfig --level 4 xfs off
chkconfig --level 4 yum-updatesd off
chkconfig --del avahi-daemon
chkconfig --del acpid
chkconfig --del auditd
chkconfig --del irqbalance
chkconfig --del mdmpd
chkconfig --del avahi-dnsconfd
chkconfig --del NetworkManager
chkconfig --del NetworkManagerDispatcher
chkconfig --del dhcdbd
chkconfig --del dund
chkconfig --del firstboot
chkconfig --del irda
chkconfig --del apmd
chkconfig --del smartd
chkconfig --del kudzu
chkconfig --del hidd
chkconfig --del gpm
chkconfig --del pcscd
chkconfig --del bluetooth
chkconfig --del cpuspeed
chkconfig --del cups
chkconfig --del rdisc
chkconfig --del sendmail
chkconfig --del readahead_later
chkconfig --del syslog
chkconfig --del wpa_supplicant
chkconfig --del pand
chkconfig --del netplugd
echo "Fetching Java"
curl -o /tmp/updates/jdk-6u2-linux-amd64.rpm http://s3.amazonaws.com/rightscale_software/jdk-6u2-linux-amd64.rpm
curl -o /tmp/updates/sun-javadb-client-10.2.2-0.1.i386.rpm http://s3.amazonaws.com/rightscale_software/sun-javadb-client-10.2.2-0.1.i386.rpm
curl -o /tmp/updates/sun-javadb-common-10.2.2-0.1.i386.rpm http://s3.amazonaws.com/rightscale_software/sun-javadb-common-10.2.2-0.1.i386.rpm
curl -o /tmp/updates/sun-javadb-core-10.2.2-0.1.i386.rpm http://s3.amazonaws.com/rightscale_software/sun-javadb-core-10.2.2-0.1.i386.rpm
curl -o /tmp/updates/sun-javadb-demo-10.2.2-0.1.i386.rpm http://s3.amazonaws.com/rightscale_software/sun-javadb-demo-10.2.2-0.1.i386.rpm
curl -o /tmp/updates/sun-javadb-docs-10.2.2-0.1.i386.rpm http://s3.amazonaws.com/rightscale_software/sun-javadb-docs-10.2.2-0.1.i386.rpm
curl -o /tmp/updates/sun-javadb-javadoc-10.2.2-0.1.i386.rpm http://s3.amazonaws.com/rightscale_software/sun-javadb-javadoc-10.2.2-0.1.i386.rpm
echo "Installing Software"
cd /tmp/updates
curl -o /tmp/updates/bwm-ng-0.5-1.x86_64.rpm http://s3.amazonaws.com/rightscale_software/bwm-ng-0.5-1.x86_64.rpm
rpm -Uvh /tmp/updates/*.rpm --nodeps --force
tar -xvzf linux-2.6.16.33-ec2.tgz
mv linux-2.6.16.33-xenU/ /usr/src/
ln -sf /usr/src/linux-2.6.16.33-xenU/include/acpi /usr/include/acpi
ln -sf /usr/src/linux-2.6.16.33-xenU/include/asm /usr/include/asm
ln -sf /usr/src/linux-2.6.16.33-xenU/include/asm /usr/include/asm-generic
ln -sf /usr/src/linux-2.6.16.33-xenU/include/config /usr/include/config
ln -sf /usr/src/linux-2.6.16.33-xenU/include/keys /usr/include/keys
ln -sf /usr/src/linux-2.6.16.33-xenU/include/linux /usr/include/linux
ln -sf /usr/src/linux-2.6.16.33-xenU/include/math-emu /usr/include/math-emu
ln -sf /usr/src/linux-2.6.16.33-xenU/include/media /usr/include/media
ln -sf /usr/src/linux-2.6.16.33-xenU/include/mtd /usr/include/mtd
ln -sf /usr/src/linux-2.6.16.33-xenU/include/pcmcia /usr/include/pcmcia
ln -sf /usr/src/linux-2.6.16.33-xenU/include/rdma /usr/include/rdma
ln -sf /usr/src/linux-2.6.16.33-xenU/include/rxrpc /usr/include/rxrpc
ln -sf /usr/src/linux-2.6.16.33-xenU/include/sound /usr/include/sound
ln -sf /usr/src/linux-2.6.16.33-xenU/include/video /usr/include/video
ln -sf /usr/src/linux-2.6.16.33-xenU/include/xen /usr/include/xen
echo "Configuring Java Home"
echo "export JAVA_HOME=/usr/java/default" >> /etc/profile.d/java.sh
chmod +x /etc/profile.d/java.sh
echo "Add EC2 Tools"
mkdir /home/ec2
mkdir /home/ec2/etc
curl -o /tmp/ec2-api-tools.zip http://s3.amazonaws.com/rightscale_software/ec2-api-tools.zip
unzip /tmp/ec2-api-tools.zip -d /tmp/
mv /tmp/ec2-api-tools-1.2-13740/* /home/ec2/
ln -sf /usr/lib/site_ruby/aes/ /usr/lib/ruby/site_ruby/1.8/aes
rm -fr /tmp/ec2*
chmod -R o-w /home/ec2
echo "More EC2 Mods"
cat < <'PROMPT'> /etc/profile.d/prompt.sh
PS1="[\u@\h:\w] "
PROMPT
chmod +x /etc/profile.d/prompt.sh
cat < <'EC2'> /etc/profile.d/ec2.sh
export EC2_HOME=/home/ec2
export EC2_CERT=
export EC2_PRIVATE_KEY=
export AWS_ACCOUNT_NUMBER=
export AWS_ACCESS_KEY_ID=
export AWS_SECRET_ACCESS_KEY=
export PATH=$PATH:/home/ec2/bin/
EC2
chmod +x /etc/profile.d/ec2.sh
ln -f /opt/rightscale/etc/motd /etc/motd
echo "RubyGems"
wget http://rubyforge.org/frs/download.php/20989/rubygems-0.9.4.tgz
tar -xvzf rubygems-0.9.4.tgz
cd rubygems-0.9.4
ruby setup.rb
gem update
gem source -a http://mirror.rightscale.com
#cat < <'GEM'> /root/.gemrc
#gem: --source http://mirror.rightscale.com
#GEM
mkdir -p /tmp/updates
curl -o /tmp/updates/s3sync.gem http://s3.amazonaws.com/rightscale_software/s3sync-1.1.4.gem
gem install /tmp/updates/s3sync.gem
gem install xml-simple net-ssh net-sftp -y
updatedb
cat <
#!/bin/bash
#
# do_amitools_update.sh: updates ami-tools to the latest version..
#
## Include Files:
. /var/spool/ec2/meta-data.sh
. /var/spool/ec2/user-data.sh
# Update the EC2 AMI creation tools
echo " + Updating ec2-ami-tools"
curl -o /tmp/ec2-ami-tools.noarch.rpm http://s3.amazonaws.com/ec2-downloads/ec2-ami-tools.noarch.rpm && \
rpm -Uvh /tmp/ec2-ami-tools.noarch.rpm && \
echo " + Updated ec2-ami-tools"
## Cleanup FileSystem
rm -f /tmp/ec2-ami-tools.noarch.rpm
rm -f /tmp/ec2-ami-tools.noarch.rpm.*
AMI
chmod +x /etc/cron.daily/do_amitools_update.sh
cat < <'YUM'> /etc/yum.repos.d/CentOS-Base.repo
# CentOS-Base.repo
#
# This file uses a new mirrorlist system developed by Lance Davis for CentOS.
# The mirror system uses the connecting IP address of the client and the
# update status of each mirror to pick mirrors that are updated to and
# geographically close to the client. You should use this for CentOS updates
# unless you are manually picking other mirrors.
#
# If the mirrorlist= does not work for you, as a fall back you can try the
# remarked out baseurl= line instead.
#
#
[base]
name=CentOS-$releasever - Base
baseurl=http://mirror.rightscale.com/centos/$releasever/os/$basearch/
http://mirrors.kernel.org/centos/$releasever/os/$basearch/
mirrorlist=http://mirrorlist.centos.org/?release=$releasever&arch=$basearch&repo=os
failovermethod=priority
gpgcheck=1
enabled=1
gpgkey=http://mirror.centos.org/centos/RPM-GPG-KEY-CentOS-5
[updates]
name=CentOS-$releasever - Updates
baseurl=http://mirror.rightscale.com/centos/$releasever/updates/$basearch/
http://mirrors.kernel.org/centos/$releasever/updates/$basearch/
mirrorlist=http://mirrorlist.centos.org/?release=$releasever&arch=$basearch&repo=updates
failovermethod=priority
enabled=1
gpgcheck=1
gpgkey=http://mirror.centos.org/centos/RPM-GPG-KEY-CentOS-5
#packages used/produced in the build but not released
[addons]
name=CentOS-$releasever - Addons
mirrorlist=http://mirrorlist.centos.org/?release=$releasever&arch=$basearch&repo=addons
#baseurl=http://mirror.centos.org/centos/$releasever/addons/$basearch/
gpgcheck=1
gpgkey=http://mirror.centos.org/centos/RPM-GPG-KEY-CentOS-5
#additional packages that may be useful
[extras]
name=CentOS-$releasever - Extras
mirrorlist=http://mirrorlist.centos.org/?release=$releasever&arch=$basearch&repo=extras
#baseurl=http://mirror.centos.org/centos/$releasever/extras/$basearch/
gpgcheck=1
gpgkey=http://mirror.centos.org/centos/RPM-GPG-KEY-CentOS-5
#additional packages that extend functionality of existing packages
[centosplus]
name=CentOS-$releasever - Plus
mirrorlist=http://mirrorlist.centos.org/?release=$releasever&arch=$basearch&repo=centosplus
#baseurl=http://mirror.centos.org/centos/$releasever/centosplus/$basearch/
gpgcheck=1
enabled=0
gpgkey=http://mirror.centos.org/centos/RPM-GPG-KEY-CentOS-5
#contrib - packages by Centos Users
[contrib]
name=CentOS-$releasever - Contrib
mirrorlist=http://mirrorlist.centos.org/?release=$releasever&arch=$basearch&repo=contrib
#baseurl=http://mirror.centos.org/centos/$releasever/contrib/$basearch/
gpgcheck=1
enabled=0
gpgkey=http://mirror.centos.org/centos/RPM-GPG-KEY-CentOS-5
YUM
cat < <'EOF'> /root/.bashrc
# .bashrc
# User specific aliases and functions
alias rm='rm -i'
alias cp='cp -i'
alias mv='mv -i'
# Source global definitions
if [ -f /etc/bashrc ]; then
. /etc/bashrc
fi
EOF
cat < <'EOF'> /root/.bash_profile
# .bash_profile
# Get the aliases and functions
if [ -f ~/.bashrc ]; then
. ~/.bashrc
fi
# User specific environment and startup programs
PATH=$PATH:$HOME/bin
export PATH
unset USERNAME
EOF
cat < <'EOF'> /root/.bash_logout
# ~/.bash_logout
clear
EOF
touch /root/.bash_logout
exit
EOL
chmod +x /mnt/ec2-fs/tmp/updates/install-script
chroot /mnt/ec2-fs/ /tmp/updates/install-script
echo "all Done"
echo "Cleaning up Image"
rm -fr /mnt/ec2-fs/tmp/updates
echo "Finished Step 4"
;;
"5")
echo "Prepping for upload"
sync
#umount -dlf /mnt/ec2-fs/proc
#umount -dlf /mnt/ec2-fs
echo "Bundling Image"
#ec2-bundle-image -i /mnt/image/$IMAGE_NAME -k $EC2_PRIVATE_KEY -c $EC2_CERT -u $AWS_ACCOUNT_NUMBER
mkdir -p /mnt/tmp
ec2-bundle-vol -v /mnt/ec2-fs -d /mnt/tmp -p $IMAGE_NAME -k $EC2_PRIVATE_KEY -c $EC2_CERT -u $AWS_ACCOUNT_NUMBER
echo "Finished Step 5"
;;
"6")
echo "Uploading"
ec2-upload-bundle -b $AWS_BUCKET -m /mnt/tmp/$IMAGE_NAME.manifest.xml -a $AWS_ACCESS_KEY_ID -s $AWS_SECRET_ACCESS_KEY
echo "Finished Step 6"
;;
"7")
echo "Cleanup"
umount /mnt/ec2-fs/proc
umount /mnt/ec2-fs
rm -fr /mnt/image/
rm -fr /mnt/ec2-fs
echo "File System Cleaned"
echo "Finished Step 7"
;;
"8")
exit
;;
esac
done
Thursday, May 22, 2008
PERL ONE LINERS
Level: Introductory
This article, as regular readers may have guessed, is the sequel to "One-liners 101," which appeared in a previous installment of "Cultured Perl". The earlier article is an absolute requirement for understanding the material here, so please take a look at it before you continue.
The goal of this article, as with its predecessor, is to show legible and reusable code, not necessarily the shortest or most efficient version of a program. With that in mind, let's get to the code!
Awk is commonly used for basic tasks such as breaking up text into fields; Perl excels at text manipulation by design. Thus, we come to our first one-liner, intended to add two columns in the text input to the script.
Listing 1. Like awk?
# add first and penultimate columns
# NOTE the equivalent awk script:
# awk '{i = NF - 1; print $1 + $i}'
perl -lane 'print $F[0] + $F[-2]'
So what does it do? The magic is in the switches. The -n and -a switches make the script a wrapper around input that splits the input on whitespace into the @F array; the -e switch adds an extra statement into the wrapper. The code of interest actually produced is:
Listing 2: The full Monty
while (<>)
{
@F = split(' ');
print $F[0] + $F[-2]; # offset -2 means "2nd to last element of the array"
}
Another common task is to print the contents of a file between two markers or between two line numbers.
Listing 3: Printing a range of lines
# 1. just lines 15 to 17
perl -ne 'print if 15 .. 17'
# 2. just lines NOT between line 10 and 20
perl -ne 'print unless 10 .. 20'
# 3. lines between START and END
perl -ne 'print if /^START$/ .. /^END$/'
# 4. lines NOT between START and END
perl -ne 'print unless /^START$/ .. /^END$/'
A problem with the first one-liner in Listing 3 is that it will go through the whole file, even if the necessary range has already been covered. The third one-liner does not have that problem, because it will print all the lines between the START and END markers. If there are eight sets of START/END markers, the third one-liner will print the lines inside all eight sets.
Preventing the inefficiency of the first one-liner is easy: just use the $. variable, which tells you the current line. Start printing if $. is over 15 and exit if $. is greater than 17.
Listing 4: Printing a numeric range of lines more efficiently
# just lines 15 to 17, efficiently
perl -ne 'print if $. >= 15; exit if $. >= 17;'
Enough printing, let's do some editing. Needless to say, if you are experimenting with one-liners, especially ones intended to modify data, you should keep backups. You wouldn't be the first programmer to think a minor modification couldn't possibly make a difference to a one-liner program; just don't make that assumption while editing the Sendmail configuration or your mailbox.
Listing 5: In-place editing
# 1. in-place edit of *.c files changing all foo to bar
perl -p -i.bak -e 's/\bfoo\b/bar/g' *.c
# 2. delete first 10 lines
perl -i.old -ne 'print unless 1 .. 10' foo.txt
# 3. change all the isolated oldvar occurrences to newvar
perl -i.old -pe 's{\boldvar\b}{newvar}g' *.[chy]
# 4. increment all numbers found in these files
perl -i.tiny -pe 's/(\d+)/ 1 + $1 /ge' file1 file2 ....
# 5. delete all but lines between START and END
perl -i.old -ne 'print unless /^START$/ .. /^END$/' foo.txt
# 6. binary edit (careful!)
perl -i.bak -pe 's/Mozilla/Slopoke/g' /usr/local/bin/netscape
Why does 1 .. 10 specify line numbers 1 through 10? Read the "perldoc perlop" manual page. Basically, the .. operator iterates through a range. Thus, the script does not count 10 lines, it counts 10 iterations of the loop generated by the -n switch (see "perldoc perlrun" and Listing 2 for an example of that loop).
The magic of the -i switch is that it replaces each file in @ARGV with the version produced by the script's output on that file. Thus, the -i switch makes Perl into an editing text filter. Do not forget to use the backup option to the -i switch. Following the i with an extension will make a backup of the edited file using that extension.
Note how the -p and -n switch are used. The -n switch is used when you want explicitly to print out data. The -p switch implicitly inserts a print $_ statement in the loop produced by the -n switch. Thus, the -p switch is better for full processing of a file, while the -n switch is better for selective file processing, where only specific data needs to be printed.
Examples of in-place editing can also be found in the "One-liners 101" article.
Reversing the contents of a file is not a common task, but the following one-liners show than the -n and -p switches are not always the best choice when processing an entire file.
Listing 6: Reversal of files' fortunes
# 1. command-line that reverses the whole input by lines
# (printing each line in reverse order)
perl -e 'print reverse <>' file1 file2 file3 ....
# 2. command-line that shows each line with its characters backwards
perl -nle 'print scalar reverse $_' file1 file2 file3 ....
# 3. find palindromes in the /usr/dict/words dictionary file
perl -lne '$_ = lc $_; print if $_ eq reverse' /usr/dict/words
# 4. command-line that reverses all the bytes in a file
perl -0777e 'print scalar reverse <>' f1 f2 f3 ...
# 5. command-line that reverses each paragraph in the file but prints
# them in order
perl -00 -e 'print reverse <>' file1 file2 file3 ....
The -0 (zero) flag is very useful if you want to read a full paragraph or a full file into a single string. (It also works with any character number, so you can use a special character as a marker.) Be careful when reading a full file in one command (-0777), because a large file will use up all your memory. If you need to read the contents of a file backwards (for instance, to analyze a log in reverse order), use the CPAN module File::ReadBackwards. Also see "One-liners 101," which shows an example of log analysis with File::ReadBackwards.
Note the similarity between the first and second scripts in Listing 6. The first one, however, is completely different from the second one. The difference lies in using <> in scalar context (as -n does in the second script) or list context (as the first script does).
The third script, the palindrome detector, did not originally have the $_ = lc $_; segment. I added that to catch those palindromes like "Bob" that are not the same backwards.
My addition can be written as $_ = lc; as well, but explicitly stating the subject of the lc() function makes the one-liner more legible, in my opinion.
Listing 7: Rewrite with a random number
# replace string XYZ with a random number less than 611 in these files
perl -i.bak -pe "s/XYZ/int rand(611)/e" f1 f2 f3
This is a filter that replaces XYZ with a random number less than 611 (that number is arbitrarily chosen). Remember the rand() function returns a random number between 0 and its argument.
Note that XYZ will be replaced by a different random number every time, because the substitution evaluates "int rand(611)" every time.
Listing 8: Revealing the files' base nature
# 1. Run basename on contents of file
perl -pe "s@.*/@@gio" INDEX
# 2. Run dirname on contents of file
perl -pe 's@^(.*/)[^/]+@$1\n@' INDEX
# 3. Run basename on contents of file
perl -MFile::Basename -ne 'print basename $_' INDEX
# 4. Run dirname on contents of file
perl -MFile::Basename -ne 'print dirname $_' INDEX
One-liners 1 and 2 came from Paul, while 3 and 4 were my rewrites of them with the File::Basename module. Their purpose is simple, but any system administrator will find these one-liners useful.
Listing 9: Moving or renaming, it's all the same in UNIX
# 1. write command to mv dirs XYZ_asd to Asd
# (you may have to preface each '!' with a '\' depending on your shell)
ls | perl -pe 's!([^_]+)_(.)(.*)!mv $1_$2$3 \u$2\E$3!gio'
# 2. Write a shell script to move input from xyz to Xyz
ls | perl -ne 'chop; printf "mv $_ %s\n", ucfirst $_;'
For regular users or system administrators, renaming files based on a pattern is a very common task. The scripts above will do two kinds of job: either remove the file name portion up to the _ character, or change each filename so that its first letter is uppercased according to the Perl ucfirst() function.
There is a UNIX utility called "mmv" by Vladimir Lanin that may also be of interest. It allows you to rename files based on simple patterns, and it's surprisingly powerful. See the Resources section for a link to this utility.
Some of mine
The following is not a one-liner, but it's a pretty useful script that started as a one-liner. It is similar to Listing 7 in that it replaces a fixed string, but the trick is that the replacement itself for the fixed string becomes the fixed string the next time.
The idea came from a newsgroup posting a long time ago, but I haven't been able to find original version. The script is useful in case you need to replace one IP address with another in all your system files -- for instance, if your default router has changed. The script includes $0 (in UNIX, usually the name of the script) in the list of files to rewrite.
As a one-liner it ultimately proved too complex, and the messages regarding what is about to be executed are necessary when system files are going to be modified.
Listing 10: Replace one IP address with another one
#!/usr/bin/perl -w
use Regexp::Common qw/net/; # provides the regular expressions for IP matching
my $replacement = shift @ARGV; # get the new IP address
die "You must provide $0 with a replacement string for the IP 111.111.111.111"
unless $replacement;
# we require that $replacement be JUST a valid IP address
die "Invalid IP address provided: [$replacement]"
unless $replacement =~ m/^$RE{net}{IPv4}$/;
# replace the string in each file
foreach my $file ($0, qw[/etc/hosts /etc/defaultrouter /etc/ethers], @ARGV)
{
# note that we know $replacement is a valid IP address, so this is
# not a dangerous invocation
my $command = "perl -p -i.bak -e 's/111.111.111.111/$replacement/g' $file";
print "Executing [$command]\n";
system($command);
}
Note the use of the Regexp::Common module, an indispensable resource for any Perl programmer today. Without Regexp::Common, you will be wasting a lot of time trying to match a number or other common patterns manually, and you're likely to get it wrong.
This article, as regular readers may have guessed, is the sequel to "One-liners 101," which appeared in a previous installment of "Cultured Perl". The earlier article is an absolute requirement for understanding the material here, so please take a look at it before you continue.
The goal of this article, as with its predecessor, is to show legible and reusable code, not necessarily the shortest or most efficient version of a program. With that in mind, let's get to the code!
Awk is commonly used for basic tasks such as breaking up text into fields; Perl excels at text manipulation by design. Thus, we come to our first one-liner, intended to add two columns in the text input to the script.
Listing 1. Like awk?
# add first and penultimate columns
# NOTE the equivalent awk script:
# awk '{i = NF - 1; print $1 + $i}'
perl -lane 'print $F[0] + $F[-2]'
So what does it do? The magic is in the switches. The -n and -a switches make the script a wrapper around input that splits the input on whitespace into the @F array; the -e switch adds an extra statement into the wrapper. The code of interest actually produced is:
Listing 2: The full Monty
while (<>)
{
@F = split(' ');
print $F[0] + $F[-2]; # offset -2 means "2nd to last element of the array"
}
Another common task is to print the contents of a file between two markers or between two line numbers.
Listing 3: Printing a range of lines
# 1. just lines 15 to 17
perl -ne 'print if 15 .. 17'
# 2. just lines NOT between line 10 and 20
perl -ne 'print unless 10 .. 20'
# 3. lines between START and END
perl -ne 'print if /^START$/ .. /^END$/'
# 4. lines NOT between START and END
perl -ne 'print unless /^START$/ .. /^END$/'
A problem with the first one-liner in Listing 3 is that it will go through the whole file, even if the necessary range has already been covered. The third one-liner does not have that problem, because it will print all the lines between the START and END markers. If there are eight sets of START/END markers, the third one-liner will print the lines inside all eight sets.
Preventing the inefficiency of the first one-liner is easy: just use the $. variable, which tells you the current line. Start printing if $. is over 15 and exit if $. is greater than 17.
Listing 4: Printing a numeric range of lines more efficiently
# just lines 15 to 17, efficiently
perl -ne 'print if $. >= 15; exit if $. >= 17;'
Enough printing, let's do some editing. Needless to say, if you are experimenting with one-liners, especially ones intended to modify data, you should keep backups. You wouldn't be the first programmer to think a minor modification couldn't possibly make a difference to a one-liner program; just don't make that assumption while editing the Sendmail configuration or your mailbox.
Listing 5: In-place editing
# 1. in-place edit of *.c files changing all foo to bar
perl -p -i.bak -e 's/\bfoo\b/bar/g' *.c
# 2. delete first 10 lines
perl -i.old -ne 'print unless 1 .. 10' foo.txt
# 3. change all the isolated oldvar occurrences to newvar
perl -i.old -pe 's{\boldvar\b}{newvar}g' *.[chy]
# 4. increment all numbers found in these files
perl -i.tiny -pe 's/(\d+)/ 1 + $1 /ge' file1 file2 ....
# 5. delete all but lines between START and END
perl -i.old -ne 'print unless /^START$/ .. /^END$/' foo.txt
# 6. binary edit (careful!)
perl -i.bak -pe 's/Mozilla/Slopoke/g' /usr/local/bin/netscape
Why does 1 .. 10 specify line numbers 1 through 10? Read the "perldoc perlop" manual page. Basically, the .. operator iterates through a range. Thus, the script does not count 10 lines, it counts 10 iterations of the loop generated by the -n switch (see "perldoc perlrun" and Listing 2 for an example of that loop).
The magic of the -i switch is that it replaces each file in @ARGV with the version produced by the script's output on that file. Thus, the -i switch makes Perl into an editing text filter. Do not forget to use the backup option to the -i switch. Following the i with an extension will make a backup of the edited file using that extension.
Note how the -p and -n switch are used. The -n switch is used when you want explicitly to print out data. The -p switch implicitly inserts a print $_ statement in the loop produced by the -n switch. Thus, the -p switch is better for full processing of a file, while the -n switch is better for selective file processing, where only specific data needs to be printed.
Examples of in-place editing can also be found in the "One-liners 101" article.
Reversing the contents of a file is not a common task, but the following one-liners show than the -n and -p switches are not always the best choice when processing an entire file.
Listing 6: Reversal of files' fortunes
# 1. command-line that reverses the whole input by lines
# (printing each line in reverse order)
perl -e 'print reverse <>' file1 file2 file3 ....
# 2. command-line that shows each line with its characters backwards
perl -nle 'print scalar reverse $_' file1 file2 file3 ....
# 3. find palindromes in the /usr/dict/words dictionary file
perl -lne '$_ = lc $_; print if $_ eq reverse' /usr/dict/words
# 4. command-line that reverses all the bytes in a file
perl -0777e 'print scalar reverse <>' f1 f2 f3 ...
# 5. command-line that reverses each paragraph in the file but prints
# them in order
perl -00 -e 'print reverse <>' file1 file2 file3 ....
The -0 (zero) flag is very useful if you want to read a full paragraph or a full file into a single string. (It also works with any character number, so you can use a special character as a marker.) Be careful when reading a full file in one command (-0777), because a large file will use up all your memory. If you need to read the contents of a file backwards (for instance, to analyze a log in reverse order), use the CPAN module File::ReadBackwards. Also see "One-liners 101," which shows an example of log analysis with File::ReadBackwards.
Note the similarity between the first and second scripts in Listing 6. The first one, however, is completely different from the second one. The difference lies in using <> in scalar context (as -n does in the second script) or list context (as the first script does).
The third script, the palindrome detector, did not originally have the $_ = lc $_; segment. I added that to catch those palindromes like "Bob" that are not the same backwards.
My addition can be written as $_ = lc; as well, but explicitly stating the subject of the lc() function makes the one-liner more legible, in my opinion.
Listing 7: Rewrite with a random number
# replace string XYZ with a random number less than 611 in these files
perl -i.bak -pe "s/XYZ/int rand(611)/e" f1 f2 f3
This is a filter that replaces XYZ with a random number less than 611 (that number is arbitrarily chosen). Remember the rand() function returns a random number between 0 and its argument.
Note that XYZ will be replaced by a different random number every time, because the substitution evaluates "int rand(611)" every time.
Listing 8: Revealing the files' base nature
# 1. Run basename on contents of file
perl -pe "s@.*/@@gio" INDEX
# 2. Run dirname on contents of file
perl -pe 's@^(.*/)[^/]+@$1\n@' INDEX
# 3. Run basename on contents of file
perl -MFile::Basename -ne 'print basename $_' INDEX
# 4. Run dirname on contents of file
perl -MFile::Basename -ne 'print dirname $_' INDEX
One-liners 1 and 2 came from Paul, while 3 and 4 were my rewrites of them with the File::Basename module. Their purpose is simple, but any system administrator will find these one-liners useful.
Listing 9: Moving or renaming, it's all the same in UNIX
# 1. write command to mv dirs XYZ_asd to Asd
# (you may have to preface each '!' with a '\' depending on your shell)
ls | perl -pe 's!([^_]+)_(.)(.*)!mv $1_$2$3 \u$2\E$3!gio'
# 2. Write a shell script to move input from xyz to Xyz
ls | perl -ne 'chop; printf "mv $_ %s\n", ucfirst $_;'
For regular users or system administrators, renaming files based on a pattern is a very common task. The scripts above will do two kinds of job: either remove the file name portion up to the _ character, or change each filename so that its first letter is uppercased according to the Perl ucfirst() function.
There is a UNIX utility called "mmv" by Vladimir Lanin that may also be of interest. It allows you to rename files based on simple patterns, and it's surprisingly powerful. See the Resources section for a link to this utility.
Some of mine
The following is not a one-liner, but it's a pretty useful script that started as a one-liner. It is similar to Listing 7 in that it replaces a fixed string, but the trick is that the replacement itself for the fixed string becomes the fixed string the next time.
The idea came from a newsgroup posting a long time ago, but I haven't been able to find original version. The script is useful in case you need to replace one IP address with another in all your system files -- for instance, if your default router has changed. The script includes $0 (in UNIX, usually the name of the script) in the list of files to rewrite.
As a one-liner it ultimately proved too complex, and the messages regarding what is about to be executed are necessary when system files are going to be modified.
Listing 10: Replace one IP address with another one
#!/usr/bin/perl -w
use Regexp::Common qw/net/; # provides the regular expressions for IP matching
my $replacement = shift @ARGV; # get the new IP address
die "You must provide $0 with a replacement string for the IP 111.111.111.111"
unless $replacement;
# we require that $replacement be JUST a valid IP address
die "Invalid IP address provided: [$replacement]"
unless $replacement =~ m/^$RE{net}{IPv4}$/;
# replace the string in each file
foreach my $file ($0, qw[/etc/hosts /etc/defaultrouter /etc/ethers], @ARGV)
{
# note that we know $replacement is a valid IP address, so this is
# not a dangerous invocation
my $command = "perl -p -i.bak -e 's/111.111.111.111/$replacement/g' $file";
print "Executing [$command]\n";
system($command);
}
Note the use of the Regexp::Common module, an indispensable resource for any Perl programmer today. Without Regexp::Common, you will be wasting a lot of time trying to match a number or other common patterns manually, and you're likely to get it wrong.
Handy One Liners for SED COmmand
Handy one-liners for SED
HANDY ONE-LINERS FOR SED (Unix stream editor)
Latest version of this file is usually at:
http://www.student.northpark.edu/pemente/sed/sed1line.txt
http://www.cornerstonemag.com/sed/sed1line.txt
FILE SPACING:
# double space a file
sed G
# double space a file which already has blank lines in it. Output file
# should contain no more than one blank line between lines of text.
sed '/^$/d;G'
# triple space a file
sed 'G;G'
# undo double-spacing (assumes even-numbered lines are always blank)
sed 'n;d'
NUMBERING:
# number each line of a file (simple left alignment). Using a tab (see
# note on '\t' at end of file) instead of space will preserve margins.
sed = filename | sed 'N;s/\n/\t/'
# number each line of a file (number on left, right-aligned)
sed = filename | sed 'N; s/^/ /; s/ *\(.\{6,\}\)\n/\1 /'
# number each line of file, but only print numbers if line is not blank
sed '/./=' filename | sed '/./N; s/\n/ /'
# count lines (emulates "wc -l")
sed -n '$='
TEXT CONVERSION AND SUBSTITUTION:
# IN UNIX ENVIRONMENT: convert DOS newlines (CR/LF) to Unix format
sed 's/.$//' # assumes that all lines end with CR/LF
sed 's/^M$//' # in bash/tcsh, press Ctrl-V then Ctrl-M
sed 's/\x0D$//' # gsed 3.02.80, but top script is easier
# IN UNIX ENVIRONMENT: convert Unix newlines (LF) to DOS format
sed "s/$/`echo -e \\\r`/" # command line under ksh
sed 's/$'"/`echo \\\r`/" # command line under bash
sed "s/$/`echo \\\r`/" # command line under zsh
sed 's/$/\r/' # gsed 3.02.80
# IN DOS ENVIRONMENT: convert Unix newlines (LF) to DOS format
sed "s/$//" # method 1
sed -n p # method 2
# IN DOS ENVIRONMENT: convert DOS newlines (CR/LF) to Unix format
# Cannot be done with DOS versions of sed. Use "tr" instead.
tr -d \routfile # GNU tr version 1.22 or higher
# delete leading whitespace (spaces, tabs) from front of each line
# aligns all text flush left
sed 's/^[ \t]*//' # see note on '\t' at end of file
# delete trailing whitespace (spaces, tabs) from end of each line
sed 's/[ \t]*$//' # see note on '\t' at end of file
# delete BOTH leading and trailing whitespace from each line
sed 's/^[ \t]*//;s/[ \t]*$//'
# insert 5 blank spaces at beginning of each line (make page offset)
sed 's/^/ /'
# align all text flush right on a 79-column width
sed -e :a -e 's/^.\{1,78\}$/ &/;ta' # set at 78 plus 1 space
# center all text in the middle of 79-column width. In method 1,
# spaces at the beginning of the line are significant, and trailing
# spaces are appended at the end of the line. In method 2, spaces at
# the beginning of the line are discarded in centering the line, and
# no trailing spaces appear at the end of lines.
sed -e :a -e 's/^.\{1,77\}$/ & /;ta' # method 1
sed -e :a -e 's/^.\{1,77\}$/ &/;ta' -e 's/\( *\)\1/\1/' # method 2
# substitute (find and replace) "foo" with "bar" on each line
sed 's/foo/bar/' # replaces only 1st instance in a line
sed 's/foo/bar/4' # replaces only 4th instance in a line
sed 's/foo/bar/g' # replaces ALL instances in a line
sed 's/\(.*\)foo\(.*foo\)/\1bar\2/' # replace the next-to-last case
sed 's/\(.*\)foo/\1bar/' # replace only the last case
# substitute "foo" with "bar" ONLY for lines which contain "baz"
sed '/baz/s/foo/bar/g'
# substitute "foo" with "bar" EXCEPT for lines which contain "baz"
sed '/baz/!s/foo/bar/g'
# change "scarlet" or "ruby" or "puce" to "red"
sed 's/scarlet/red/g;s/ruby/red/g;s/puce/red/g' # most seds
gsed 's/scarlet\|ruby\|puce/red/g' # GNU sed only
# reverse order of lines (emulates "tac")
# bug/feature in HHsed v1.5 causes blank lines to be deleted
sed '1!G;h;$!d' # method 1
sed -n '1!G;h;$p' # method 2
# reverse each character on the line (emulates "rev")
sed '/\n/!G;s/\(.\)\(.*\n\)/&\2\1/;//D;s/.//'
# join pairs of lines side-by-side (like "paste")
sed '$!N;s/\n/ /'
# if a line ends with a backslash, append the next line to it
sed -e :a -e '/\\$/N; s/\\\n//; ta'
# if a line begins with an equal sign, append it to the previous line
# and replace the "=" with a single space
sed -e :a -e '$!N;s/\n=/ /;ta' -e 'P;D'
# add commas to numeric strings, changing "1234567" to "1,234,567"
gsed ':a;s/\B[0-9]\{3\}\>/,&/;ta' # GNU sed
sed -e :a -e 's/\(.*[0-9]\)\([0-9]\{3\}\)/\1,\2/;ta' # other seds
# add commas to numbers with decimal points and minus signs (GNU sed)
gsed ':a;s/\(^\|[^0-9.]\)\([0-9]\+\)\([0-9]\{3\}\)/\1\2,\3/g;ta'
# add a blank line every 5 lines (after lines 5, 10, 15, 20, etc.)
gsed '0~5G' # GNU sed only
sed 'n;n;n;n;G;' # other seds
SELECTIVE PRINTING OF CERTAIN LINES:
# print first 10 lines of file (emulates behavior of "head")
sed 10q
# print first line of file (emulates "head -1")
sed q
# print the last 10 lines of a file (emulates "tail")
sed -e :a -e '$q;N;11,$D;ba'
# print the last 2 lines of a file (emulates "tail -2")
sed '$!N;$!D'
# print the last line of a file (emulates "tail -1")
sed '$!d' # method 1
sed -n '$p' # method 2
# print only lines which match regular expression (emulates "grep")
sed -n '/regexp/p' # method 1
sed '/regexp/!d' # method 2
# print only lines which do NOT match regexp (emulates "grep -v")
sed -n '/regexp/!p' # method 1, corresponds to above
sed '/regexp/d' # method 2, simpler syntax
# print the line immediately before a regexp, but not the line
# containing the regexp
sed -n '/regexp/{g;1!p;};h'
# print the line immediately after a regexp, but not the line
# containing the regexp
sed -n '/regexp/{n;p;}'
# print 1 line of context before and after regexp, with line number
# indicating where the regexp occurred (similar to "grep -A1 -B1")
sed -n -e '/regexp/{=;x;1!p;g;$!N;p;D;}' -e h
# grep for AAA and BBB and CCC (in any order)
sed '/AAA/!d; /BBB/!d; /CCC/!d'
# grep for AAA and BBB and CCC (in that order)
sed '/AAA.*BBB.*CCC/!d'
# grep for AAA or BBB or CCC (emulates "egrep")
sed -e '/AAA/b' -e '/BBB/b' -e '/CCC/b' -e d # most seds
gsed '/AAA\|BBB\|CCC/!d' # GNU sed only
# print paragraph if it contains AAA (blank lines separate paragraphs)
# HHsed v1.5 must insert a 'G;' after 'x;' in the next 3 scripts below
sed -e '/./{H;$!d;}' -e 'x;/AAA/!d;'
# print paragraph if it contains AAA and BBB and CCC (in any order)
sed -e '/./{H;$!d;}' -e 'x;/AAA/!d;/BBB/!d;/CCC/!d'
# print paragraph if it contains AAA or BBB or CCC
sed -e '/./{H;$!d;}' -e 'x;/AAA/b' -e '/BBB/b' -e '/CCC/b' -e d
gsed '/./{H;$!d;};x;/AAA\|BBB\|CCC/b;d' # GNU sed only
# print only lines of 65 characters or longer
sed -n '/^.\{65\}/p'
# print only lines of less than 65 characters
sed -n '/^.\{65\}/!p' # method 1, corresponds to above
sed '/^.\{65\}/d' # method 2, simpler syntax
# print section of file from regular expression to end of file
sed -n '/regexp/,$p'
# print section of file based on line numbers (lines 8-12, inclusive)
sed -n '8,12p' # method 1
sed '8,12!d' # method 2
# print line number 52
sed -n '52p' # method 1
sed '52!d' # method 2
sed '52q;d' # method 3, efficient on large files
# beginning at line 3, print every 7th line
gsed -n '3~7p' # GNU sed only
sed -n '3,${p;n;n;n;n;n;n;}' # other seds
# print section of file between two regular expressions (inclusive)
sed -n '/Iowa/,/Montana/p' # case sensitive
SELECTIVE DELETION OF CERTAIN LINES:
# print all of file EXCEPT section between 2 regular expressions
sed '/Iowa/,/Montana/d'
# delete duplicate, consecutive lines from a file (emulates "uniq").
# First line in a set of duplicate lines is kept, rest are deleted.
sed '$!N; /^\(.*\)\n\1$/!P; D'
# delete duplicate, nonconsecutive lines from a file. Beware not to
# overflow the buffer size of the hold space, or else use GNU sed.
sed -n 'G; s/\n/&&/; /^\([ -~]*\n\).*\n\1/d; s/\n//; h; P'
# delete the first 10 lines of a file
sed '1,10d'
# delete the last line of a file
sed '$d'
# delete the last 2 lines of a file
sed 'N;$!P;$!D;$d'
# delete the last 10 lines of a file
sed -e :a -e '$d;N;2,10ba' -e 'P;D' # method 1
sed -n -e :a -e '1,10!{P;N;D;};N;ba' # method 2
# delete every 8th line
gsed '0~8d' # GNU sed only
sed 'n;n;n;n;n;n;n;d;' # other seds
# delete ALL blank lines from a file (same as "grep '.' ")
sed '/^$/d' # method 1
sed '/./!d' # method 2
# delete all CONSECUTIVE blank lines from file except the first; also
# deletes all blank lines from top and end of file (emulates "cat -s")
sed '/./,/^$/!d' # method 1, allows 0 blanks at top, 1 at EOF
sed '/^$/N;/\n$/D' # method 2, allows 1 blank at top, 0 at EOF
# delete all CONSECUTIVE blank lines from file except the first 2:
sed '/^$/N;/\n$/N;//D'
# delete all leading blank lines at top of file
sed '/./,$!d'
# delete all trailing blank lines at end of file
sed -e :a -e '/^\n*$/{$d;N;ba' -e '}' # works on all seds
sed -e :a -e '/^\n*$/N;/\n$/ba' # ditto, except for gsed 3.02*
# delete the last line of each paragraph
sed -n '/^$/{p;h;};/./{x;/./p;}'
SPECIAL APPLICATIONS:
# remove nroff overstrikes (char, backspace) from man pages. The 'echo'
# command may need an -e switch if you use Unix System V or bash shell.
sed "s/.`echo \\\b`//g" # double quotes required for Unix environment
sed 's/.^H//g' # in bash/tcsh, press Ctrl-V and then Ctrl-H
sed 's/.\x08//g' # hex expression for sed v1.5
# get Usenet/e-mail message header
sed '/^$/q' # deletes everything after first blank line
# get Usenet/e-mail message body
sed '1,/^$/d' # deletes everything up to first blank line
# get Subject header, but remove initial "Subject: " portion
sed '/^Subject: */!d; s///;q'
# get return address header
sed '/^Reply-To:/q; /^From:/h; /./d;g;q'
# parse out the address proper. Pulls out the e-mail address by itself
# from the 1-line return address header (see preceding script)
sed 's/ *(.*)//; s/>.*//; s/.*[:<] *//'
# add a leading angle bracket and space to each line (quote a message)
sed 's/^/> /'
# delete leading angle bracket & space from each line (unquote a message)
sed 's/^> //'
# remove most HTML tags (accommodates multiple-line tags)
sed -e :a -e 's/<[^>]*>//g;/
# extract multi-part uuencoded binaries, removing extraneous header
# info, so that only the uuencoded portion remains. Files passed to
# sed must be passed in the proper order. Version 1 can be entered
# from the command line; version 2 can be made into an executable
# Unix shell script. (Modified from a script by Rahul Dhesi.)
sed '/^end/,/^begin/d' file1 file2 ... fileX | uudecode # vers. 1
sed '/^end/,/^begin/d' "$@" | uudecode # vers. 2
# zip up each .TXT file individually, deleting the source file and
# setting the name of each .ZIP file to the basename of the .TXT file
# (under DOS: the "dir /b" switch returns bare filenames in all caps).
echo @echo off >zipup.bat
dir /b *.txt | sed "s/^\(.*\)\.TXT/pkzip -mo \1 \1.TXT/" >>zipup.bat
TYPICAL USE: Sed takes one or more editing commands and applies all of
them, in sequence, to each line of input. After all the commands have
been applied to the first input line, that line is output and a second
input line is taken for processing, and the cycle repeats. The
preceding examples assume that input comes from the standard input
device (i.e, the console, normally this will be piped input). One or
more filenames can be appended to the command line if the input does
not come from stdin. Output is sent to stdout (the screen). Thus:
cat filename | sed '10q' # uses piped input
sed '10q' filename # same effect, avoids a useless "cat"
sed '10q' filename > newfile # redirects output to disk
For additional syntax instructions, including the way to apply editing
commands from a disk file instead of the command line, consult "sed &
awk, 2nd Edition," by Dale Dougherty and Arnold Robbins (O'Reilly,
1997; http://www.ora.com), "UNIX Text Processing," by Dale Dougherty
and Tim O'Reilly (Hayden Books, 1987) or the tutorials by Mike Arst
distributed in U-SEDIT2.ZIP (many sites). To fully exploit the power
of sed, one must understand "regular expressions." For this, see
"Mastering Regular Expressions" by Jeffrey Friedl (O'Reilly, 1997).
The manual ("man") pages on Unix systems may be helpful (try "man
sed", "man regexp", or the subsection on regular expressions in "man
ed"), but man pages are notoriously difficult. They are not written to
teach sed use or regexps to first-time users, but as a reference text
for those already acquainted with these tools.
QUOTING SYNTAX: The preceding examples use single quotes ('...')
instead of double quotes ("...") to enclose editing commands, since
sed is typically used on a Unix platform. Single quotes prevent the
Unix shell from intrepreting the dollar sign ($) and backquotes
(`...`), which are expanded by the shell if they are enclosed in
double quotes. Users of the "csh" shell and derivatives will also need
to quote the exclamation mark (!) with the backslash (i.e., \!) to
properly run the examples listed above, even within single quotes.
Versions of sed written for DOS invariably require double quotes
("...") instead of single quotes to enclose editing commands.
USE OF '\t' IN SED SCRIPTS: For clarity in documentation, we have used
the expression '\t' to indicate a tab character (0x09) in the scripts.
However, most versions of sed do not recognize the '\t' abbreviation,
so when typing these scripts from the command line, you should press
the TAB key instead. '\t' is supported as a regular expression
metacharacter in awk, perl, and HHsed, sedmod, and GNU sed v3.02.80.
VERSIONS OF SED: Versions of sed do differ, and some slight syntax
variation is to be expected. In particular, most do not support the
use of labels (:name) or branch instructions (b,t) within editing
commands, except at the end of those commands. We have used the syntax
which will be portable to most users of sed, even though the popular
GNU versions of sed allow a more succinct syntax. When the reader sees
a fairly long command such as this:
sed -e '/AAA/b' -e '/BBB/b' -e '/CCC/b' -e d
it is heartening to know that GNU sed will let you reduce it to:
sed '/AAA/b;/BBB/b;/CCC/b;d' # or even
sed '/AAA\|BBB\|CCC/b;d'
In addition, remember that while many versions of sed accept a command
like "/one/ s/RE1/RE2/", some do NOT allow "/one/! s/RE1/RE2/", which
contains space before the 's'. Omit the space when typing the command.
OPTIMIZING FOR SPEED: If execution speed needs to be increased (due to
large input files or slow processors or hard disks), substitution will
be executed more quickly if the "find" expression is specified before
giving the "s/.../.../" instruction. Thus:
sed 's/foo/bar/g' filename # standard replace command
sed '/foo/ s/foo/bar/g' filename # executes more quickly
sed '/foo/ s//bar/g' filename # shorthand sed syntax
On line selection or deletion in which you only need to output lines
from the first part of the file, a "quit" command (q) in the script
will drastically reduce processing time for large files. Thus:
sed -n '45,50p' filename # print line nos. 45-50 of a file
sed -n '51q;45,50p' filename # same, but executes much faster
Anand Shah
Rediff.com
HANDY ONE-LINERS FOR SED (Unix stream editor)
Latest version of this file is usually at:
http://www.student.northpark.edu/pemente/sed/sed1line.txt
http://www.cornerstonemag.com/sed/sed1line.txt
FILE SPACING:
# double space a file
sed G
# double space a file which already has blank lines in it. Output file
# should contain no more than one blank line between lines of text.
sed '/^$/d;G'
# triple space a file
sed 'G;G'
# undo double-spacing (assumes even-numbered lines are always blank)
sed 'n;d'
NUMBERING:
# number each line of a file (simple left alignment). Using a tab (see
# note on '\t' at end of file) instead of space will preserve margins.
sed = filename | sed 'N;s/\n/\t/'
# number each line of a file (number on left, right-aligned)
sed = filename | sed 'N; s/^/ /; s/ *\(.\{6,\}\)\n/\1 /'
# number each line of file, but only print numbers if line is not blank
sed '/./=' filename | sed '/./N; s/\n/ /'
# count lines (emulates "wc -l")
sed -n '$='
TEXT CONVERSION AND SUBSTITUTION:
# IN UNIX ENVIRONMENT: convert DOS newlines (CR/LF) to Unix format
sed 's/.$//' # assumes that all lines end with CR/LF
sed 's/^M$//' # in bash/tcsh, press Ctrl-V then Ctrl-M
sed 's/\x0D$//' # gsed 3.02.80, but top script is easier
# IN UNIX ENVIRONMENT: convert Unix newlines (LF) to DOS format
sed "s/$/`echo -e \\\r`/" # command line under ksh
sed 's/$'"/`echo \\\r`/" # command line under bash
sed "s/$/`echo \\\r`/" # command line under zsh
sed 's/$/\r/' # gsed 3.02.80
# IN DOS ENVIRONMENT: convert Unix newlines (LF) to DOS format
sed "s/$//" # method 1
sed -n p # method 2
# IN DOS ENVIRONMENT: convert DOS newlines (CR/LF) to Unix format
# Cannot be done with DOS versions of sed. Use "tr" instead.
tr -d \r
# delete leading whitespace (spaces, tabs) from front of each line
# aligns all text flush left
sed 's/^[ \t]*//' # see note on '\t' at end of file
# delete trailing whitespace (spaces, tabs) from end of each line
sed 's/[ \t]*$//' # see note on '\t' at end of file
# delete BOTH leading and trailing whitespace from each line
sed 's/^[ \t]*//;s/[ \t]*$//'
# insert 5 blank spaces at beginning of each line (make page offset)
sed 's/^/ /'
# align all text flush right on a 79-column width
sed -e :a -e 's/^.\{1,78\}$/ &/;ta' # set at 78 plus 1 space
# center all text in the middle of 79-column width. In method 1,
# spaces at the beginning of the line are significant, and trailing
# spaces are appended at the end of the line. In method 2, spaces at
# the beginning of the line are discarded in centering the line, and
# no trailing spaces appear at the end of lines.
sed -e :a -e 's/^.\{1,77\}$/ & /;ta' # method 1
sed -e :a -e 's/^.\{1,77\}$/ &/;ta' -e 's/\( *\)\1/\1/' # method 2
# substitute (find and replace) "foo" with "bar" on each line
sed 's/foo/bar/' # replaces only 1st instance in a line
sed 's/foo/bar/4' # replaces only 4th instance in a line
sed 's/foo/bar/g' # replaces ALL instances in a line
sed 's/\(.*\)foo\(.*foo\)/\1bar\2/' # replace the next-to-last case
sed 's/\(.*\)foo/\1bar/' # replace only the last case
# substitute "foo" with "bar" ONLY for lines which contain "baz"
sed '/baz/s/foo/bar/g'
# substitute "foo" with "bar" EXCEPT for lines which contain "baz"
sed '/baz/!s/foo/bar/g'
# change "scarlet" or "ruby" or "puce" to "red"
sed 's/scarlet/red/g;s/ruby/red/g;s/puce/red/g' # most seds
gsed 's/scarlet\|ruby\|puce/red/g' # GNU sed only
# reverse order of lines (emulates "tac")
# bug/feature in HHsed v1.5 causes blank lines to be deleted
sed '1!G;h;$!d' # method 1
sed -n '1!G;h;$p' # method 2
# reverse each character on the line (emulates "rev")
sed '/\n/!G;s/\(.\)\(.*\n\)/&\2\1/;//D;s/.//'
# join pairs of lines side-by-side (like "paste")
sed '$!N;s/\n/ /'
# if a line ends with a backslash, append the next line to it
sed -e :a -e '/\\$/N; s/\\\n//; ta'
# if a line begins with an equal sign, append it to the previous line
# and replace the "=" with a single space
sed -e :a -e '$!N;s/\n=/ /;ta' -e 'P;D'
# add commas to numeric strings, changing "1234567" to "1,234,567"
gsed ':a;s/\B[0-9]\{3\}\>/,&/;ta' # GNU sed
sed -e :a -e 's/\(.*[0-9]\)\([0-9]\{3\}\)/\1,\2/;ta' # other seds
# add commas to numbers with decimal points and minus signs (GNU sed)
gsed ':a;s/\(^\|[^0-9.]\)\([0-9]\+\)\([0-9]\{3\}\)/\1\2,\3/g;ta'
# add a blank line every 5 lines (after lines 5, 10, 15, 20, etc.)
gsed '0~5G' # GNU sed only
sed 'n;n;n;n;G;' # other seds
SELECTIVE PRINTING OF CERTAIN LINES:
# print first 10 lines of file (emulates behavior of "head")
sed 10q
# print first line of file (emulates "head -1")
sed q
# print the last 10 lines of a file (emulates "tail")
sed -e :a -e '$q;N;11,$D;ba'
# print the last 2 lines of a file (emulates "tail -2")
sed '$!N;$!D'
# print the last line of a file (emulates "tail -1")
sed '$!d' # method 1
sed -n '$p' # method 2
# print only lines which match regular expression (emulates "grep")
sed -n '/regexp/p' # method 1
sed '/regexp/!d' # method 2
# print only lines which do NOT match regexp (emulates "grep -v")
sed -n '/regexp/!p' # method 1, corresponds to above
sed '/regexp/d' # method 2, simpler syntax
# print the line immediately before a regexp, but not the line
# containing the regexp
sed -n '/regexp/{g;1!p;};h'
# print the line immediately after a regexp, but not the line
# containing the regexp
sed -n '/regexp/{n;p;}'
# print 1 line of context before and after regexp, with line number
# indicating where the regexp occurred (similar to "grep -A1 -B1")
sed -n -e '/regexp/{=;x;1!p;g;$!N;p;D;}' -e h
# grep for AAA and BBB and CCC (in any order)
sed '/AAA/!d; /BBB/!d; /CCC/!d'
# grep for AAA and BBB and CCC (in that order)
sed '/AAA.*BBB.*CCC/!d'
# grep for AAA or BBB or CCC (emulates "egrep")
sed -e '/AAA/b' -e '/BBB/b' -e '/CCC/b' -e d # most seds
gsed '/AAA\|BBB\|CCC/!d' # GNU sed only
# print paragraph if it contains AAA (blank lines separate paragraphs)
# HHsed v1.5 must insert a 'G;' after 'x;' in the next 3 scripts below
sed -e '/./{H;$!d;}' -e 'x;/AAA/!d;'
# print paragraph if it contains AAA and BBB and CCC (in any order)
sed -e '/./{H;$!d;}' -e 'x;/AAA/!d;/BBB/!d;/CCC/!d'
# print paragraph if it contains AAA or BBB or CCC
sed -e '/./{H;$!d;}' -e 'x;/AAA/b' -e '/BBB/b' -e '/CCC/b' -e d
gsed '/./{H;$!d;};x;/AAA\|BBB\|CCC/b;d' # GNU sed only
# print only lines of 65 characters or longer
sed -n '/^.\{65\}/p'
# print only lines of less than 65 characters
sed -n '/^.\{65\}/!p' # method 1, corresponds to above
sed '/^.\{65\}/d' # method 2, simpler syntax
# print section of file from regular expression to end of file
sed -n '/regexp/,$p'
# print section of file based on line numbers (lines 8-12, inclusive)
sed -n '8,12p' # method 1
sed '8,12!d' # method 2
# print line number 52
sed -n '52p' # method 1
sed '52!d' # method 2
sed '52q;d' # method 3, efficient on large files
# beginning at line 3, print every 7th line
gsed -n '3~7p' # GNU sed only
sed -n '3,${p;n;n;n;n;n;n;}' # other seds
# print section of file between two regular expressions (inclusive)
sed -n '/Iowa/,/Montana/p' # case sensitive
SELECTIVE DELETION OF CERTAIN LINES:
# print all of file EXCEPT section between 2 regular expressions
sed '/Iowa/,/Montana/d'
# delete duplicate, consecutive lines from a file (emulates "uniq").
# First line in a set of duplicate lines is kept, rest are deleted.
sed '$!N; /^\(.*\)\n\1$/!P; D'
# delete duplicate, nonconsecutive lines from a file. Beware not to
# overflow the buffer size of the hold space, or else use GNU sed.
sed -n 'G; s/\n/&&/; /^\([ -~]*\n\).*\n\1/d; s/\n//; h; P'
# delete the first 10 lines of a file
sed '1,10d'
# delete the last line of a file
sed '$d'
# delete the last 2 lines of a file
sed 'N;$!P;$!D;$d'
# delete the last 10 lines of a file
sed -e :a -e '$d;N;2,10ba' -e 'P;D' # method 1
sed -n -e :a -e '1,10!{P;N;D;};N;ba' # method 2
# delete every 8th line
gsed '0~8d' # GNU sed only
sed 'n;n;n;n;n;n;n;d;' # other seds
# delete ALL blank lines from a file (same as "grep '.' ")
sed '/^$/d' # method 1
sed '/./!d' # method 2
# delete all CONSECUTIVE blank lines from file except the first; also
# deletes all blank lines from top and end of file (emulates "cat -s")
sed '/./,/^$/!d' # method 1, allows 0 blanks at top, 1 at EOF
sed '/^$/N;/\n$/D' # method 2, allows 1 blank at top, 0 at EOF
# delete all CONSECUTIVE blank lines from file except the first 2:
sed '/^$/N;/\n$/N;//D'
# delete all leading blank lines at top of file
sed '/./,$!d'
# delete all trailing blank lines at end of file
sed -e :a -e '/^\n*$/{$d;N;ba' -e '}' # works on all seds
sed -e :a -e '/^\n*$/N;/\n$/ba' # ditto, except for gsed 3.02*
# delete the last line of each paragraph
sed -n '/^$/{p;h;};/./{x;/./p;}'
SPECIAL APPLICATIONS:
# remove nroff overstrikes (char, backspace) from man pages. The 'echo'
# command may need an -e switch if you use Unix System V or bash shell.
sed "s/.`echo \\\b`//g" # double quotes required for Unix environment
sed 's/.^H//g' # in bash/tcsh, press Ctrl-V and then Ctrl-H
sed 's/.\x08//g' # hex expression for sed v1.5
# get Usenet/e-mail message header
sed '/^$/q' # deletes everything after first blank line
# get Usenet/e-mail message body
sed '1,/^$/d' # deletes everything up to first blank line
# get Subject header, but remove initial "Subject: " portion
sed '/^Subject: */!d; s///;q'
# get return address header
sed '/^Reply-To:/q; /^From:/h; /./d;g;q'
# parse out the address proper. Pulls out the e-mail address by itself
# from the 1-line return address header (see preceding script)
sed 's/ *(.*)//; s/>.*//; s/.*[:<] *//'
# add a leading angle bracket and space to each line (quote a message)
sed 's/^/> /'
# delete leading angle bracket & space from each line (unquote a message)
sed 's/^> //'
# remove most HTML tags (accommodates multiple-line tags)
sed -e :a -e 's/<[^>]*>//g;/
# extract multi-part uuencoded binaries, removing extraneous header
# info, so that only the uuencoded portion remains. Files passed to
# sed must be passed in the proper order. Version 1 can be entered
# from the command line; version 2 can be made into an executable
# Unix shell script. (Modified from a script by Rahul Dhesi.)
sed '/^end/,/^begin/d' file1 file2 ... fileX | uudecode # vers. 1
sed '/^end/,/^begin/d' "$@" | uudecode # vers. 2
# zip up each .TXT file individually, deleting the source file and
# setting the name of each .ZIP file to the basename of the .TXT file
# (under DOS: the "dir /b" switch returns bare filenames in all caps).
echo @echo off >zipup.bat
dir /b *.txt | sed "s/^\(.*\)\.TXT/pkzip -mo \1 \1.TXT/" >>zipup.bat
TYPICAL USE: Sed takes one or more editing commands and applies all of
them, in sequence, to each line of input. After all the commands have
been applied to the first input line, that line is output and a second
input line is taken for processing, and the cycle repeats. The
preceding examples assume that input comes from the standard input
device (i.e, the console, normally this will be piped input). One or
more filenames can be appended to the command line if the input does
not come from stdin. Output is sent to stdout (the screen). Thus:
cat filename | sed '10q' # uses piped input
sed '10q' filename # same effect, avoids a useless "cat"
sed '10q' filename > newfile # redirects output to disk
For additional syntax instructions, including the way to apply editing
commands from a disk file instead of the command line, consult "sed &
awk, 2nd Edition," by Dale Dougherty and Arnold Robbins (O'Reilly,
1997; http://www.ora.com), "UNIX Text Processing," by Dale Dougherty
and Tim O'Reilly (Hayden Books, 1987) or the tutorials by Mike Arst
distributed in U-SEDIT2.ZIP (many sites). To fully exploit the power
of sed, one must understand "regular expressions." For this, see
"Mastering Regular Expressions" by Jeffrey Friedl (O'Reilly, 1997).
The manual ("man") pages on Unix systems may be helpful (try "man
sed", "man regexp", or the subsection on regular expressions in "man
ed"), but man pages are notoriously difficult. They are not written to
teach sed use or regexps to first-time users, but as a reference text
for those already acquainted with these tools.
QUOTING SYNTAX: The preceding examples use single quotes ('...')
instead of double quotes ("...") to enclose editing commands, since
sed is typically used on a Unix platform. Single quotes prevent the
Unix shell from intrepreting the dollar sign ($) and backquotes
(`...`), which are expanded by the shell if they are enclosed in
double quotes. Users of the "csh" shell and derivatives will also need
to quote the exclamation mark (!) with the backslash (i.e., \!) to
properly run the examples listed above, even within single quotes.
Versions of sed written for DOS invariably require double quotes
("...") instead of single quotes to enclose editing commands.
USE OF '\t' IN SED SCRIPTS: For clarity in documentation, we have used
the expression '\t' to indicate a tab character (0x09) in the scripts.
However, most versions of sed do not recognize the '\t' abbreviation,
so when typing these scripts from the command line, you should press
the TAB key instead. '\t' is supported as a regular expression
metacharacter in awk, perl, and HHsed, sedmod, and GNU sed v3.02.80.
VERSIONS OF SED: Versions of sed do differ, and some slight syntax
variation is to be expected. In particular, most do not support the
use of labels (:name) or branch instructions (b,t) within editing
commands, except at the end of those commands. We have used the syntax
which will be portable to most users of sed, even though the popular
GNU versions of sed allow a more succinct syntax. When the reader sees
a fairly long command such as this:
sed -e '/AAA/b' -e '/BBB/b' -e '/CCC/b' -e d
it is heartening to know that GNU sed will let you reduce it to:
sed '/AAA/b;/BBB/b;/CCC/b;d' # or even
sed '/AAA\|BBB\|CCC/b;d'
In addition, remember that while many versions of sed accept a command
like "/one/ s/RE1/RE2/", some do NOT allow "/one/! s/RE1/RE2/", which
contains space before the 's'. Omit the space when typing the command.
OPTIMIZING FOR SPEED: If execution speed needs to be increased (due to
large input files or slow processors or hard disks), substitution will
be executed more quickly if the "find" expression is specified before
giving the "s/.../.../" instruction. Thus:
sed 's/foo/bar/g' filename # standard replace command
sed '/foo/ s/foo/bar/g' filename # executes more quickly
sed '/foo/ s//bar/g' filename # shorthand sed syntax
On line selection or deletion in which you only need to output lines
from the first part of the file, a "quit" command (q) in the script
will drastically reduce processing time for large files. Thus:
sed -n '45,50p' filename # print line nos. 45-50 of a file
sed -n '51q;45,50p' filename # same, but executes much faster
Anand Shah
Rediff.com
Subscribe to:
Posts (Atom)